Since the first release of Electron in 2013 we’ve come a very long way: With the high goal of conquering native, the web’s ambassadors (you and me) developed various useful projects for all kinds of use cases.
Nowadays, many of the daily tasks previously handled by native apps are now done by software that runs on top of Electron: Editing code (Hyper):
To sum this up, I don’t think I have to tell you any more how important it is and how big its impact on our industry is today. And yet, it’s still growing!
Of course, these achievements weren’t completely free of charge:
We spent hours convincing our fellow coworkers that a rewrite was worth it. We held conferences and spread the word across the whole globe, so that all of us may have the ability to convert our app ideas into reality.
Some of us even contributed our own spare time and spent it reporting issues, fixing bugs and making Electron better!
Sure, all of this has been very difficult. But let’s not rest now!
There’s still a long road ahead of us: More operating systems and devices are waiting for us. We’re barely halfway there. So much more to discover!
If you want to jump right into some code, here are a few GitHub repositories (this article talks about many more, but the ones below are the most important):
But enough of the 👏 cheering 👏 now. With the above in mind, I’d like to introduce you to a new concept of building Electron apps:
So far, we’ve either been using vanilla JavaScript or some sort of custom Webpack/Babel/Gulp setup to handle building the renderer process.
At Next.js!
Yes, I’m serious. It’s not just very good for sites and web apps, but it also makes creating Electron apps easier than ever before. That’s because it allows us - as app developers - to abstract most of the complex development environment away into a tiny tool belt.
Once implemented, Next.js will take care of:
BrowserWindow instances that are
pointing to Next.js pagesIn order for Next.js bundles to fit perfectly into how we’re building Electron apps (and to make deploying easier), we also released a feature that lets you export static files for the use in the production version of your app.
And that’s not even all yet!
So why can’t we have these wonderful features inside an Electron app without a complicated configuration setup? Well… Starting today, it’s actually possible! 🎉
As the first step into the light, we’ll spin up a fresh Electron boilerplate. This will make you understand how to create the perfect renderer process using Next.js, but also how to implement it into your existing application.
Thankfully, there’s a suitable Node.js need to be installed):
git clone https://github.com/electron/electron-quick-start.
Once it has finished setting up a clone that you can interact with on
your local device, move into the directory of the repository:
cd electron-quick-start
Now that we got the boilerplate, let’s make sure that the pre-defined
dependencies are installed. To do so, you only need to run the following
command: npm install.
Next, install the remaining dependencies that we’ll need for the
renderer. First, we’ll start with the devDependencies: The
core package of react-dom
(bundled with the production version of your app):
npm install next@beta react react-dom --save-dev.
As the last installation step, we need to define electron-next, which ensures that Electron can handle Next.js’ output in the renderer…
…and electron-is-dev, which allows us to change the main process’ behaviour depending on the environment the application is running in (you’ll understand why this is important later in this tutorial).
They will be used both in production and development, so they need to
be installed as normal dependencies:
npm install electron-next electron-is-dev --save.
Before we go on, I suggest ensuring that you’ve followed the
instructions carefully. To do so, you can start the boilerplate
application like this: npm start.
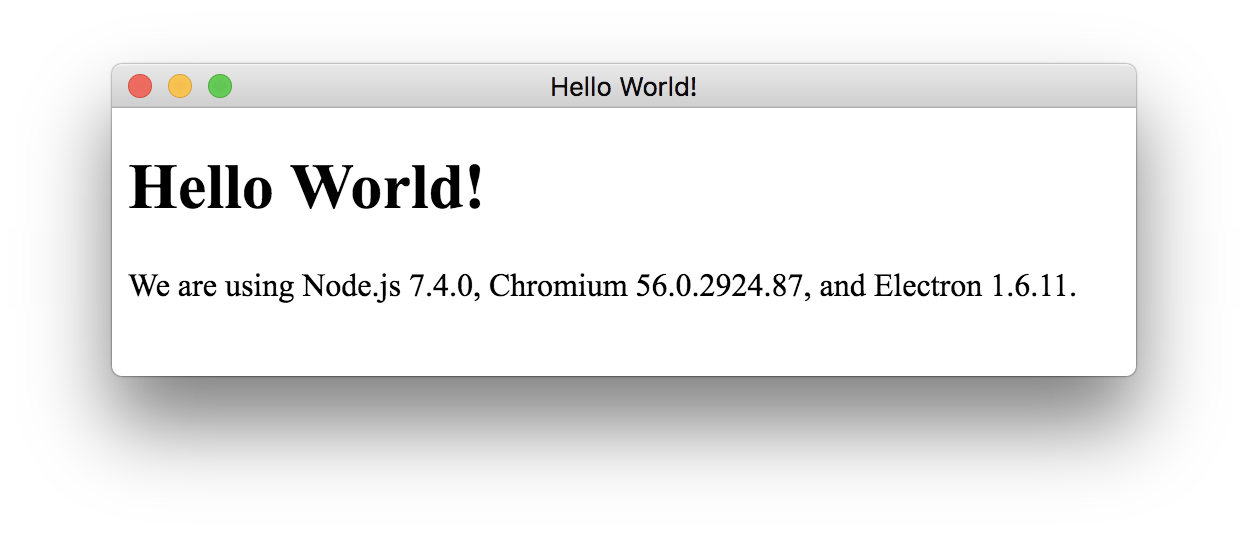
If you’ve done everything right, a window should open:
Saw it? Perfect! Now you can go on with the next section and skip the following sentence.
Looks like we’re good to go into real detail now. Are you excited? I am, at least! So let’s not waste any more time and talk about how we can add our Next.js code to our Electron project.
For the module to have something to create a bundle from, we need to
create a directory called “renderer” (I suggest calling the directory
that contains the main process code “main”). Create it and then also
move into it: mkdir renderer && cd renderer.
Inside this directory, you can build your file and folder structure just like you would do in a normal Next.js site. Take Now Desktop as an example.
For this tutorial however, we’ll only create the most important
things: An entry page and the configuration file that tells Next.js how
to behave correctly. Let’s start with the entry page (a file named
start.js inside “pages”). For now, we’ll just use basic JSX
to print out “Ahoy, Next.js” inside an HTML tag:
export default () => (
  This is Next.js speaking
)
After you’re done, create the configuration file named
next.config.js. Inside it, you only need to do handle two
things:
module.exports = {
  webpack(config) {
// Allows you to load Electron modules and
// native Node.js ones into your renderer
config.target = 'electron-renderer'
return config
  },
  exportPathMap() {
// Let Next.js know where to find the entry page
// when it's exporting the static bundle for the use
// in the production version of your app
return {
  '/start': { page: '/start' }
}
  }
}
Now we’re finished with preparing a basic renderer. In the next section, you’ll learn what you need to do in order for your application to properly bundle the code we just added (a.k.a. how to make the main process handle it).
In order for the renderer code to be built and reloaded automatically
by Next.js, we firstly need to load electron-next (which we
added as a dependency earlier) and call it inside the existing
main.js file (contains the main process’ code).
On the first line of the file, we’ll import it:
const prepareNext = require('electron-next').
Then the only thing left is calling it. For this to happen, we need to replace the existing event listener (which creates a window once the app is ready)…
app.on('ready', createWindow)
…with one that does the same but also makes the main process handle the new renderer code before creating the window:
app.on('ready', async () => {
  await prepareNext('./renderer')
  createWindow()
})
Now the only thing left is pointing the existing
BrowserWindow instance to the right URL depending on the
environment the app is running in:
In development, it should show the hot-reloading and automatically re-building instance of Next.js and in production, it needs to serve the static renderer files that were exported in advance (we’ll talk about the exporting soon).
So please move back to the first line and load this section:
const isDev = require('electron-is-dev').
Next, switch to the line where the window content gets loaded using
the .loadURL method and replace it with this:
const devPath = 'http://localhost:8000/start'
const prodPath = path.resolve('renderer/out/start/index.html')
const entry = isDev ? devPath : 'file://' + prodPath

mainWindow.loadURL(entry)
Now, when running npm start to start the application,
you should see this:
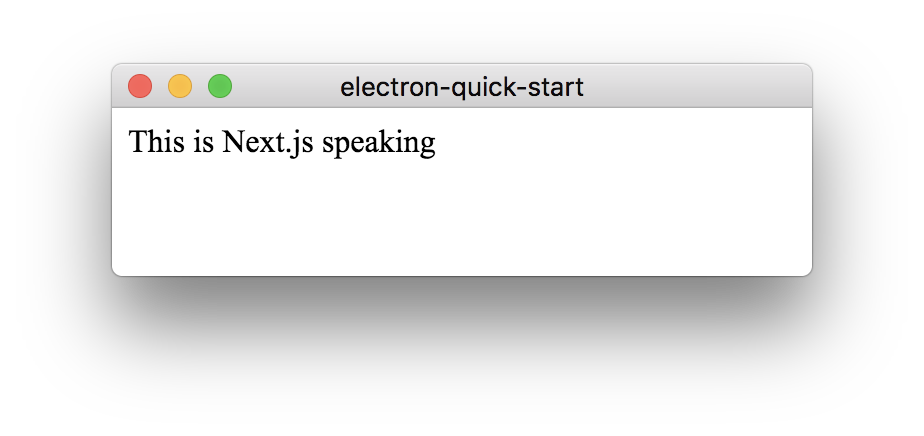
As you can see, Electron is now rendering the entry page that was
built by Next.js behind the curtains. When making changes to the
start.js file inside the “pages” directory, you’ll notice
that the code is being reloaded automatically.
From here on, you can start building a full-blown new renderer using Next.js inside the “renderer” directory – just like you would do it when building a web app! 😏
When reading this section, you’ve already learned how to implement Next.js into an Electron application and take advantage of its development workflow. However, you still haven’t understood how this works in the bundled production version of your application. The next few paragraphs will tell you.
The reason why electron-next doesn’t have the same behaviour in the final app as in development is that opening a port (like Next.js does it for providing hot reloading and auto-building of your code) is generally not a good idea because it introduces a security vulnerability on the user’s device.
It’s therefore safe for development, but not for production.
What’s much safer, however, is letting the BrowserWindow
instances directly access the static files of your renderer. This is
made possible by Next.js
3.
For this example, we’re going to use electron-builder, a widely used solution for packing your application. Please keep in mind that this is not a requirement - you can use any builder of your choice, as long as you configure it to do the same as what I’ll show you now…
Firstly, install it from npm:
npm install electron-builder --save-dev.
Then you need to modify the scripts property to include
a two new values next to the existing start one:
"scripts": {
  "start": "electron .",
  "build": "next build renderer && next export renderer",
  "dist": "npm run build && build"
}
build will tell Next.js how to build and export your
rendererdist makes electron-builder
run the build script before packing the appAfterwards, the final touch of any code file in this tutorial will be
to add a entirely new property to your package.json file:
It tells electron-builder
to only copy the needed renderer files (the ones created by
next export) to the bundle:
"build": {
  "files": [
"**/*",
"!renderer",
"renderer/out"
  ]
}
That’s it! Now you can test your packaged application in production:
npm run dist.
Isn’t that wonderfully magic? ✨
Starting today, you can use Next.js to build wonderful Electron applications that will empower and maybe even entertain your audience - your call!
In order for you to better understand how all of this comes together in the end, I also created a boilerplate, which sums all of the stuff you’ve just learned up in one repository - feel free to clone it and try it out by yourself!
Also make sure to check out electron-next. If there’s anything missing or something needs that needs to be fixed, feel free to take part!
Now the only thing left for me to say is:
Thank you for taking the time to read this article! I’m sure that we have the collective power to bring all of the web’s capabilities to native (…and beyond)! 🚀