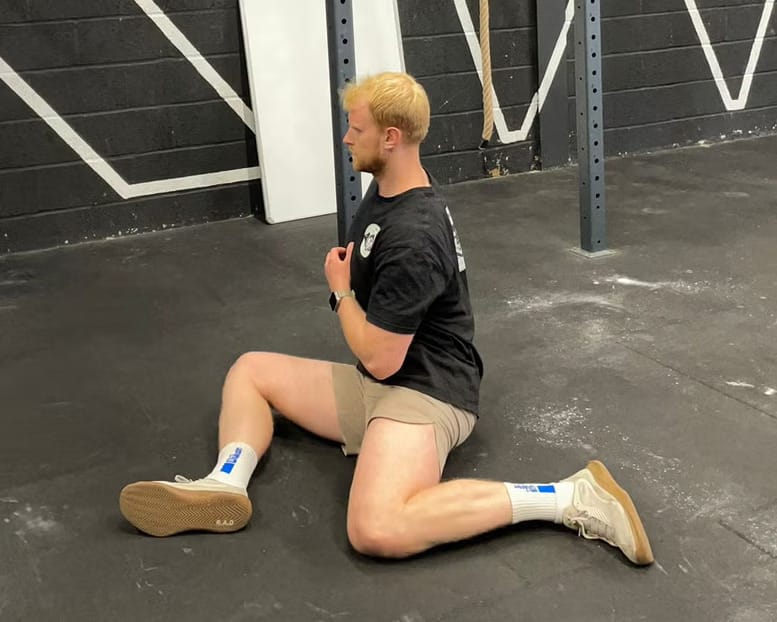
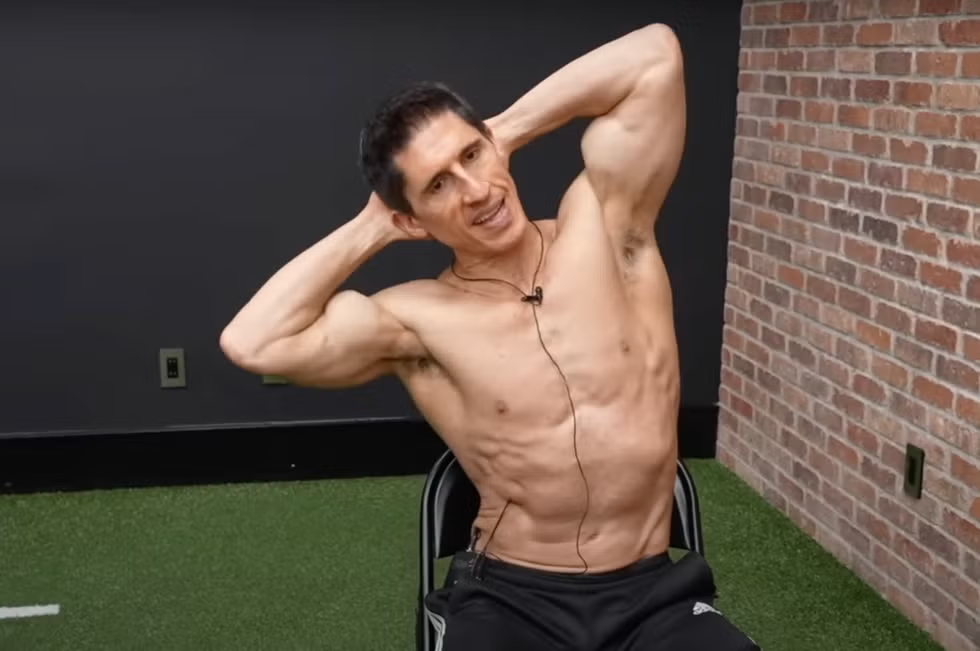
“The 90/90 is one of my favourite general stretches for the hips,” Merrick says. “It hits every single angle you’re going to require, covering both internal and external rotation of the joint, with the focus of bringing more movement and more awareness into the hips.”
He says that most people he sees are “very locked up around the hips”. As a result, “their back then ends up doing a lot of the movement for them”.
“Also, if you’re sitting a lot in the day, you’re going to get some compression and tightness of the glutes, and they then have an impact on other lower body positions like the squat,” Merrick adds. “If we get more movement into the hips, I’ve found that’s one of the best ways to help people feel more free and move better.”
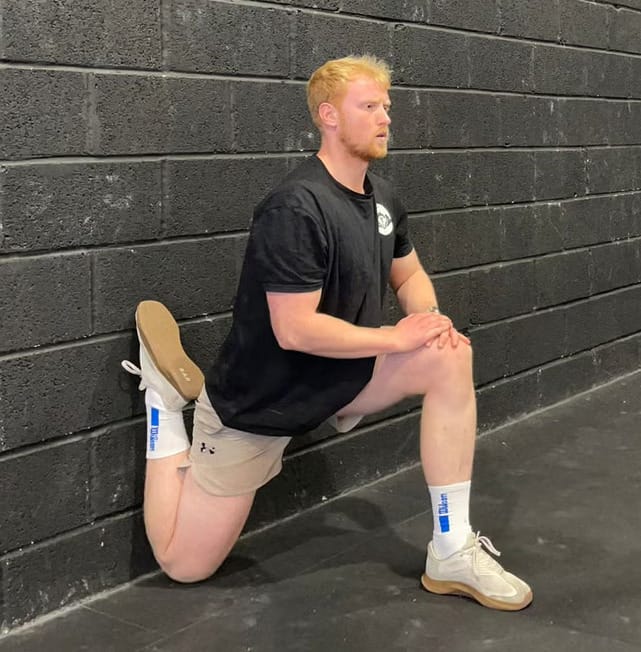
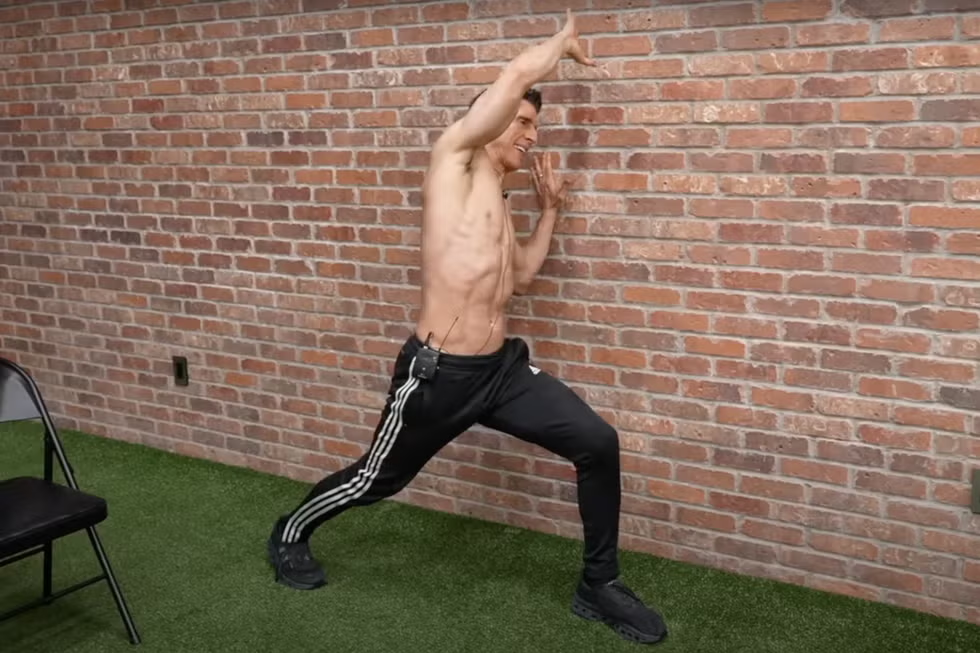
This is another stretch that targets the hip flexors – the muscles around the pelvis, responsible for bringing your knees towards your chest – as well as the quadriceps on the front of the thigh.
“If you’re doing sports like running and cycling, or you’re doing a lot of sitting, it can cause this tightening up of the quad and hip flexors,” Merrick says.
“The nature of these activities means you’re encouraging that flexed forward, tightened position [of the hips]. The couch stretch provides more of an extended position – the opposite experience to the stuff you would normally do day to day.
“It’s also a really nice one because a lot of hip stretches won’t include knee flexion [bending], which is going to stretch our rectus femoris – part of the quad muscle.”
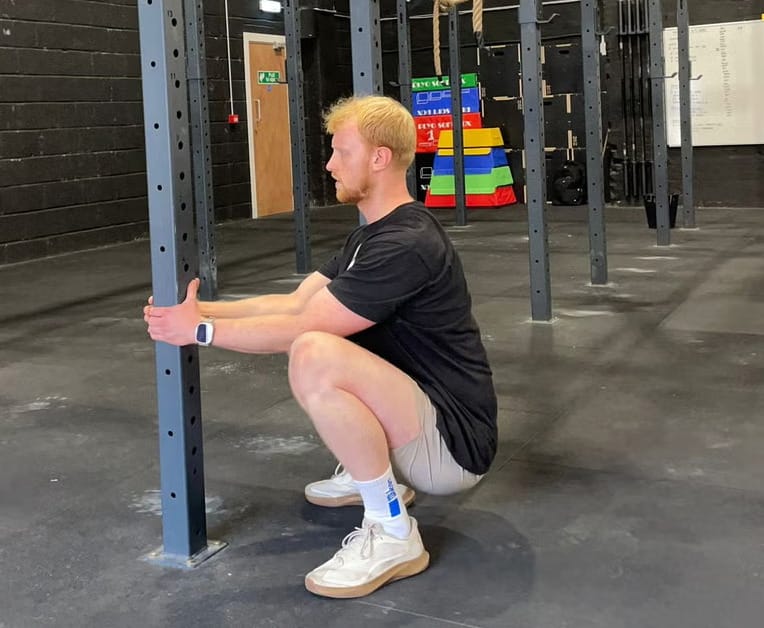
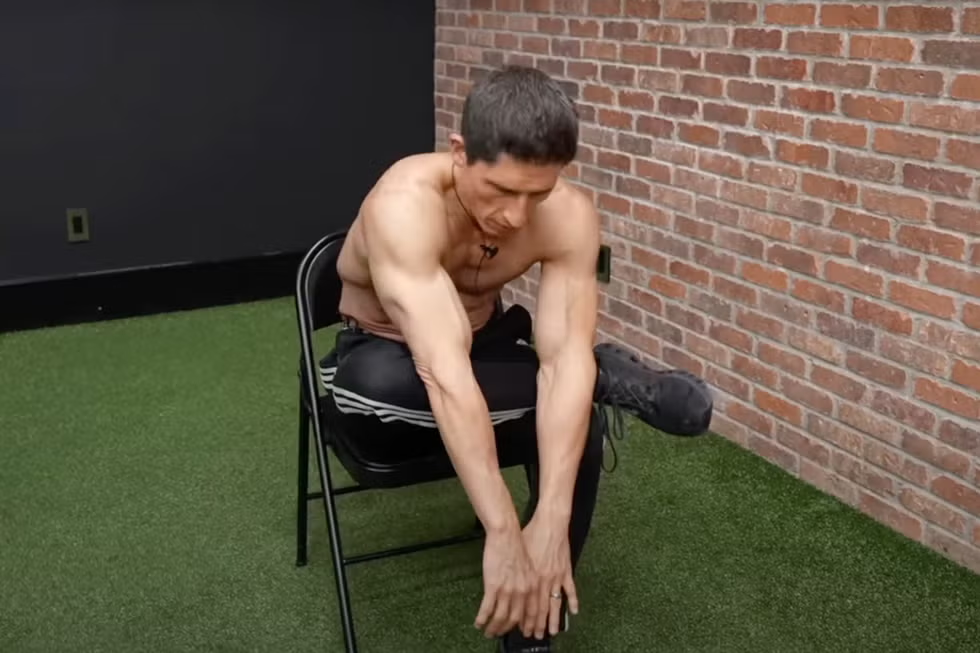
This one might sound more like a strength-building exercise than a stretch, but Merrick says being able to hold a solid squat position “demonstrates a reasonable flexibility at several joints including the ankle, knee and hips”.
“This is a fundamental human position, and it’s a useful one to be able to get into,” he adds. “If you’re going to do any form of resistance training, you’re probably going to come across a squat, and if you have kids or want to pick something up from the ground, you’re going to want to be able to access this low position.”
To remedy this, he recommends practising sitting in a deep squat position while holding a sturdy anchor point in front of you, focusing on keeping your chest up and maintaining good positions.
“This comes down to the SAID [specific adaptation to imposed demand] principle,” says Merrick. “If you want to get better at X, do X more, so find a way you can sit in a squat comfortably, then you can spend some time wiggling about, moving, and trying to get a good stretch.”
Read more: Why squats should be a staple feature in your workouts, according to an expert coach
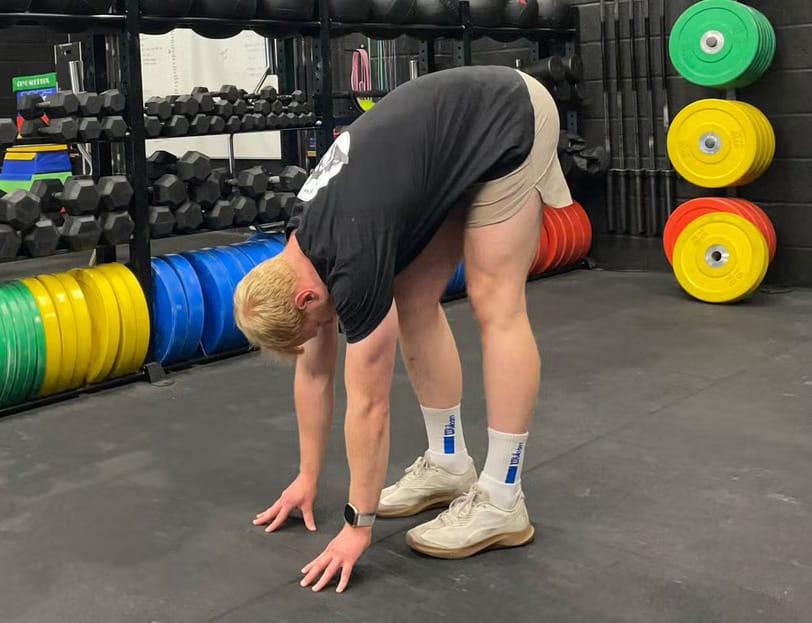
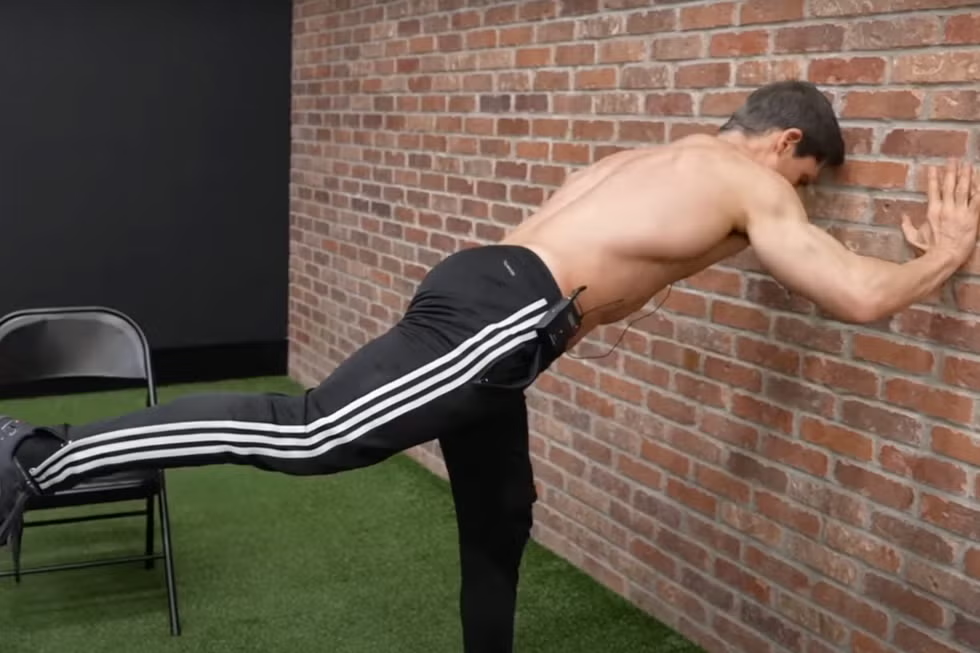
The hamstrings are the large muscles that run down the back of the thigh. In his time working with people to improve their flexibility, Merrick says tightness in this area is one of the main things that hampers clients’ freedom of movement.
“If you want to work on more advanced flexibility, the hamstrings are almost like a key. If you unlock them, it lets the hips tilt and move more freely, which then is going to make you feel more flexible in general for things like squatting. So stretching the hamstrings in one form or another is great.”
He says the elephant walk, where you reach towards the ground and straighten one leg at a time to stretch your hamstrings and shift your hips, is his favourite position for achieving this.
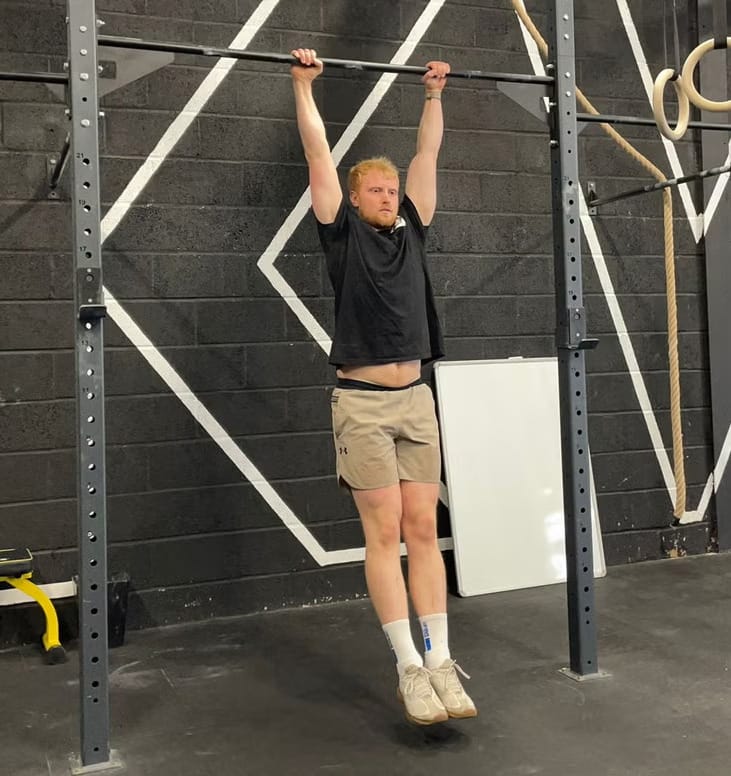
Like the squat before it, Merrick says the hang covers a lot of bases. It can aid overhead flexibility for improved shoulder health, stretch a range of muscles around the shoulder joint including the latissimus dorsi in the back and pectorals in the chest, and it provides decompression of the spine too.
“During the day we might get a lot of compression in the spine just from being on our feet, moving around, sitting down,” he explains. “Hanging allows gravity to pull that spine down and lengthen it.”
“We know that grip strength is a really important factor, one for sports but also for longevity,” Merrick says. “From hanging, we’re going to naturally build some strength in the grip - being able to hang for between 30 and 60 seconds would be a good target for most people.”
| Sets | Reps | Rest |
|---|---|---|
| 1 | 5 - 10 | 0 |
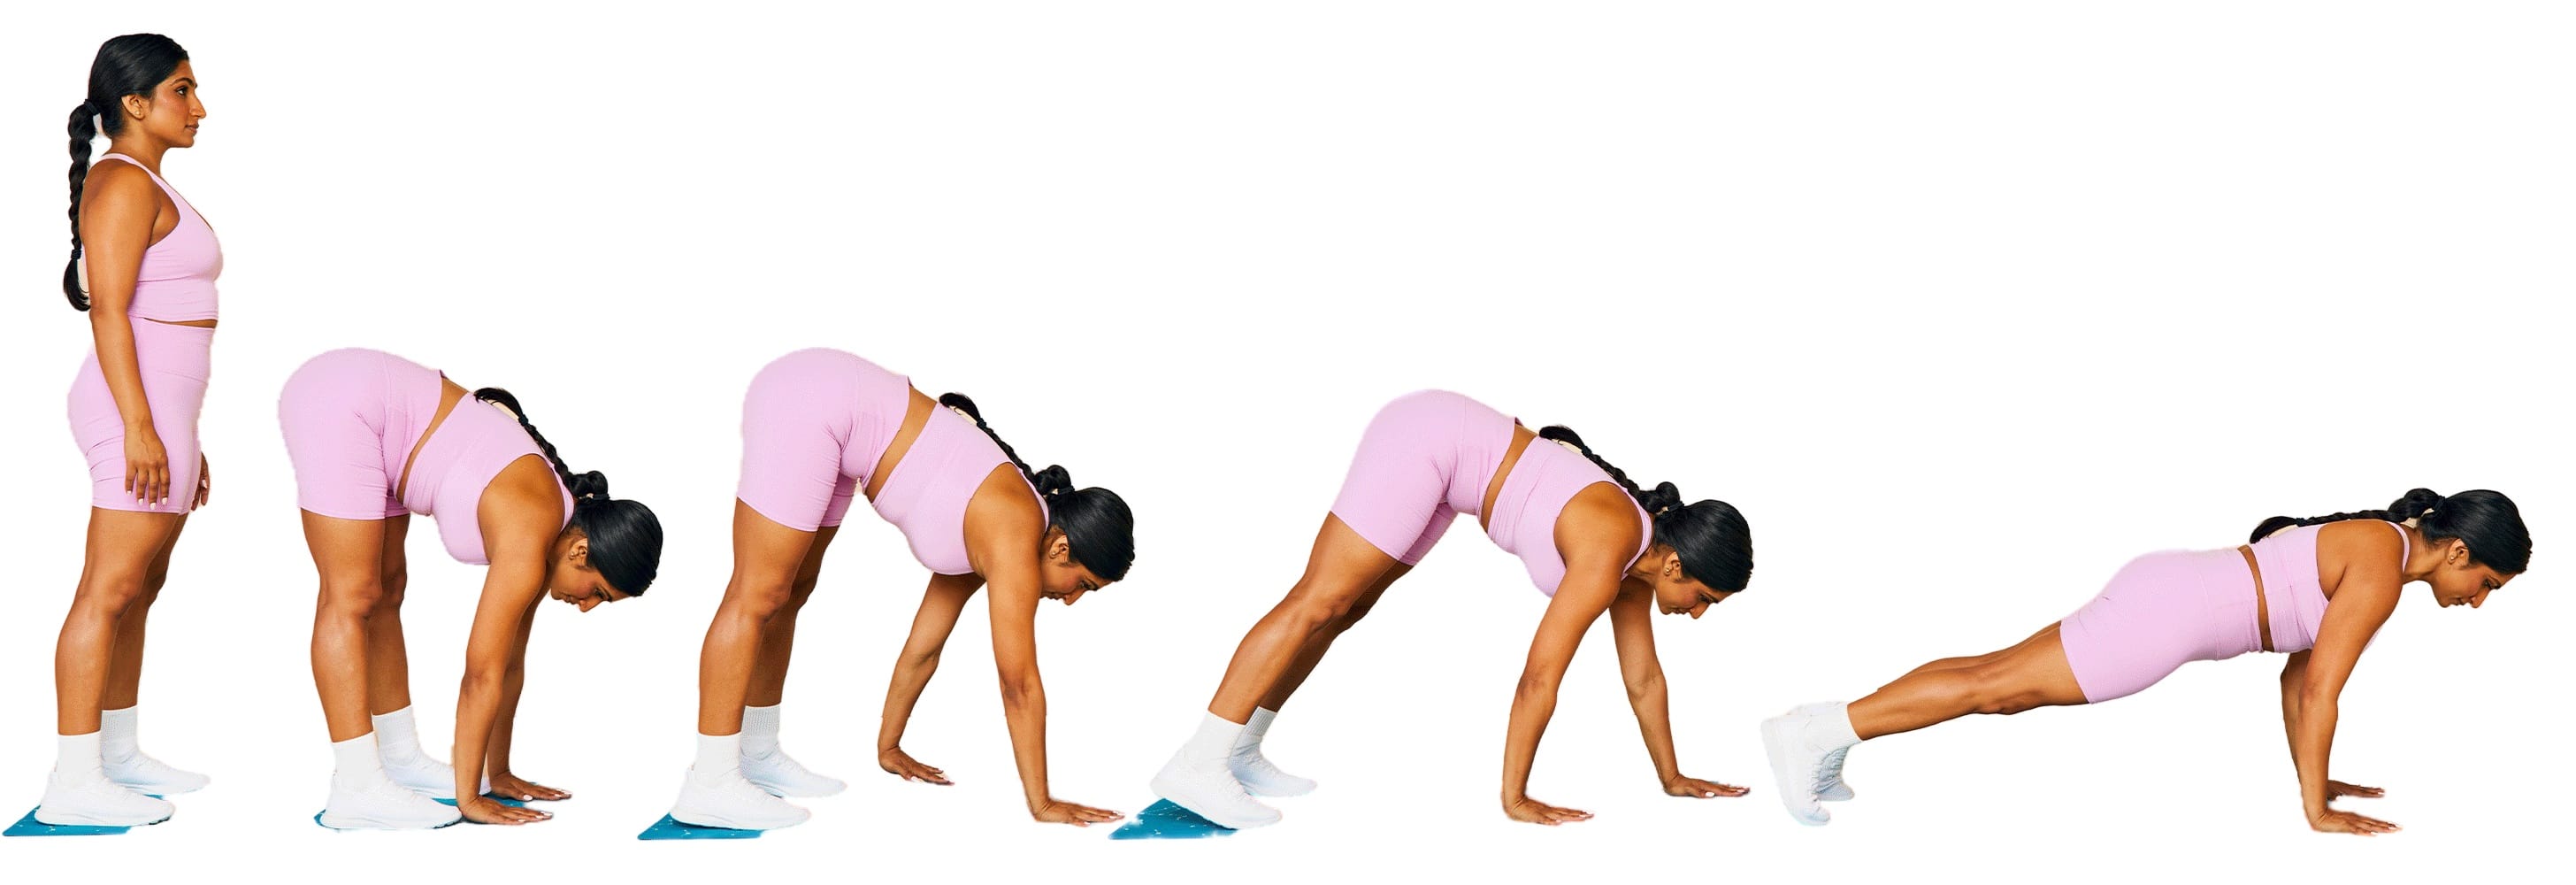
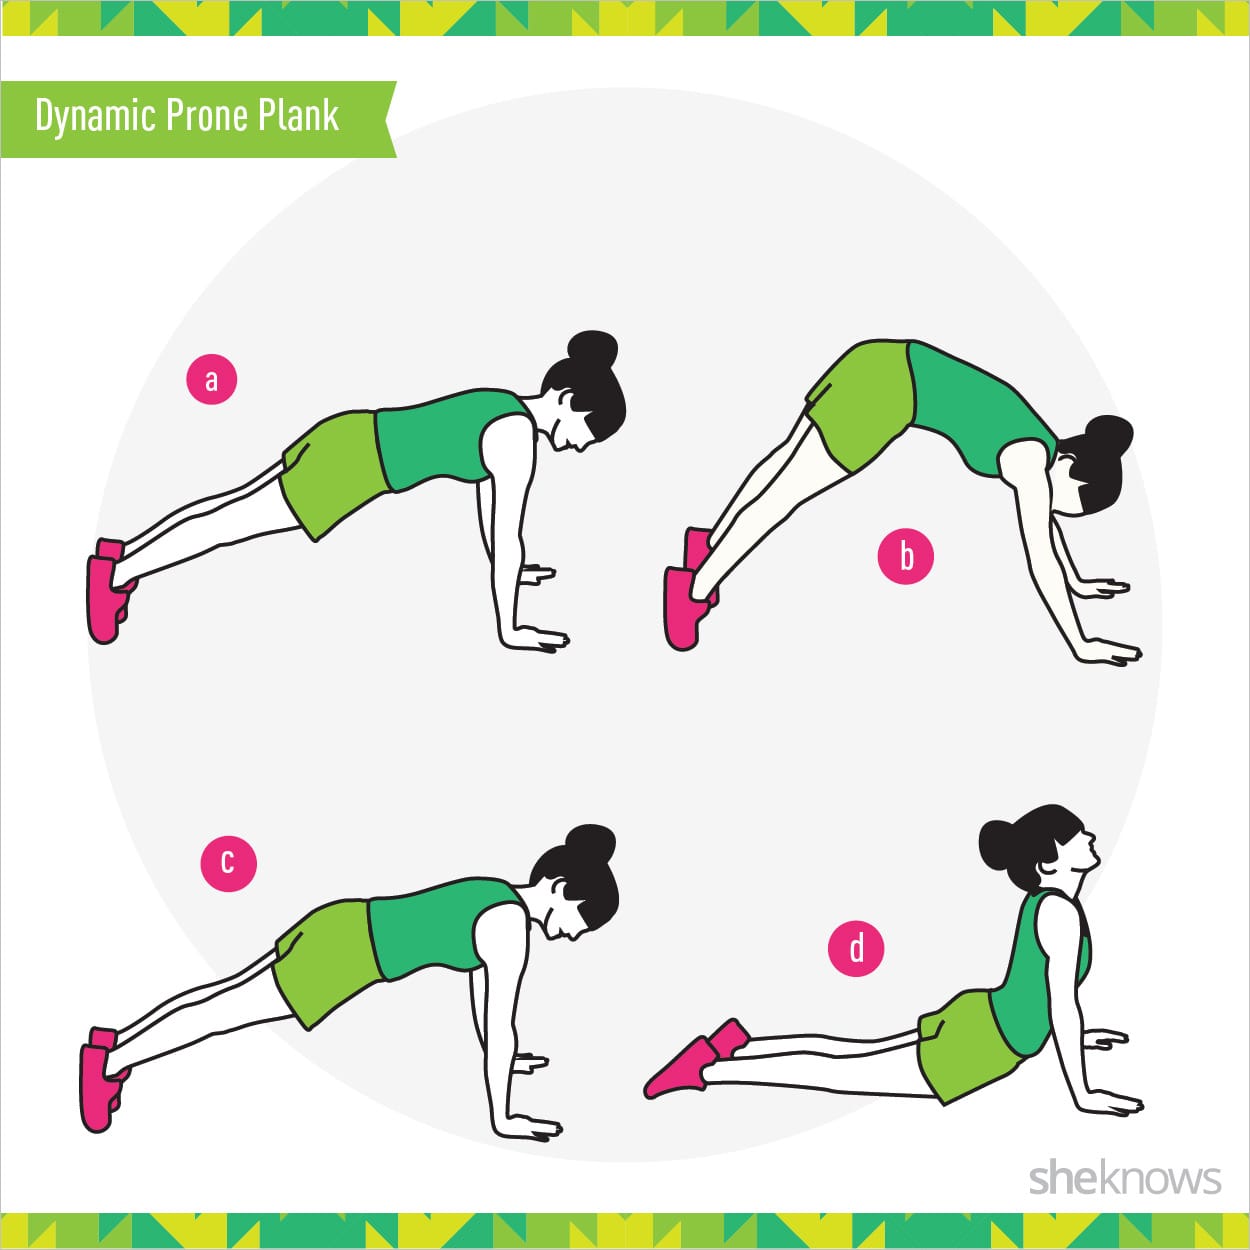
If you’re a fan of yoga, you probably know how to do an inchworm already — it’s essentially the same movement that’s used to help people transition from downward dog to plank. Here’s a step-by-step guide.
An inchworm might look basic, but it’s no joke. If the full motion is a bit too much of a challenge, there are plenty of modifications to try.
“I do this every day, especially after running,” Ezekh says. “It hits all the right spots.”
“This one’s a classic for a reason,” Ezekh says. “I love this after long periods of sitting or driving—it’s a quick way to feel looser.”
“This is a great combo of stretching and strengthening, and it’s perfect for warming up before workouts,” Ezekh says.
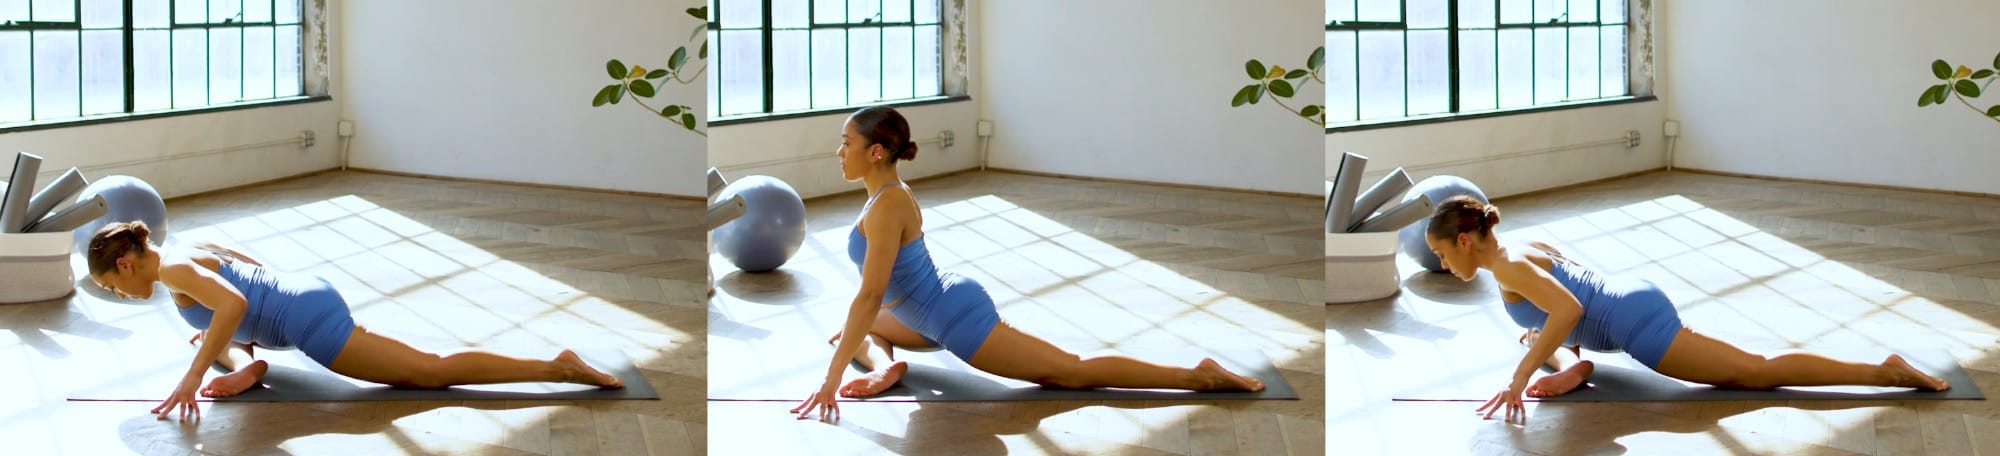
“This one’s my personal favorite,” Ezekh says. “After a run or heavy leg day, I sink into pigeon pose and let my hips stretch deeply. It’s the ultimate hip opener.”
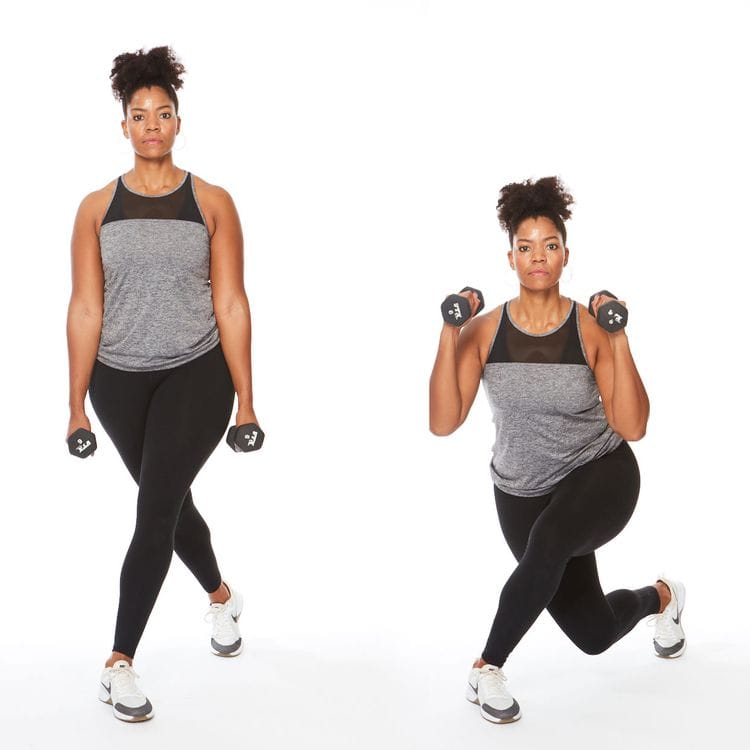
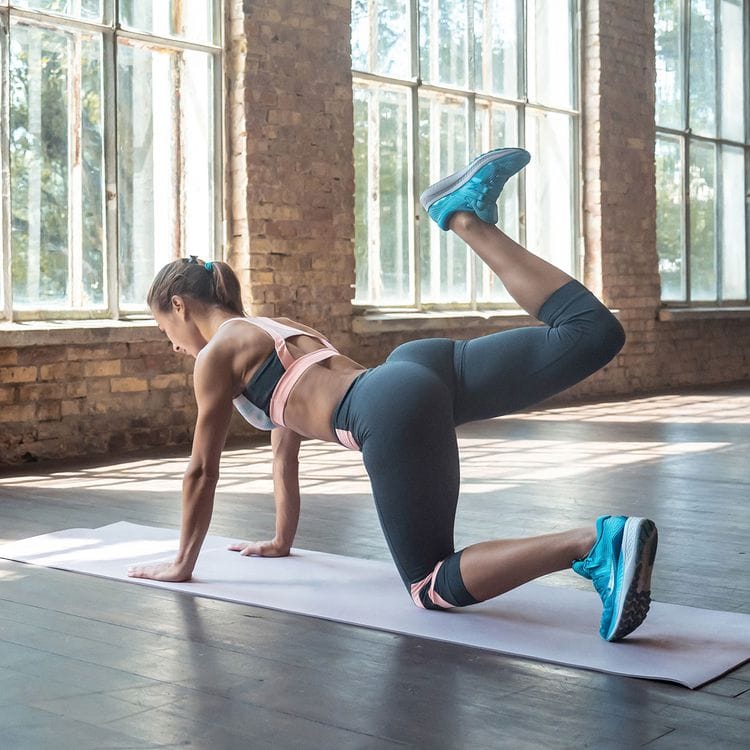
Turn up the power in your butt workouts at the gym or at home with this lunge variation that activates the gluteus medius, a smaller glute muscle on the side of your butt that helps to externally rotate the hip. To make the move more difficult, do it with a pair of dumbbells or a kettlebell held in the goblet squat position.
Do 3 sets of 15 reps per side.
This bodyweight move can be done anywhere for ease, and you can make it more challenging with the use of resistance bands or a light dumbbell behind the knee. Plus, the flexed heel curling toward your butt activates your hamstrings nicely.
Do 3 sets of 8 to 12 reps per leg.
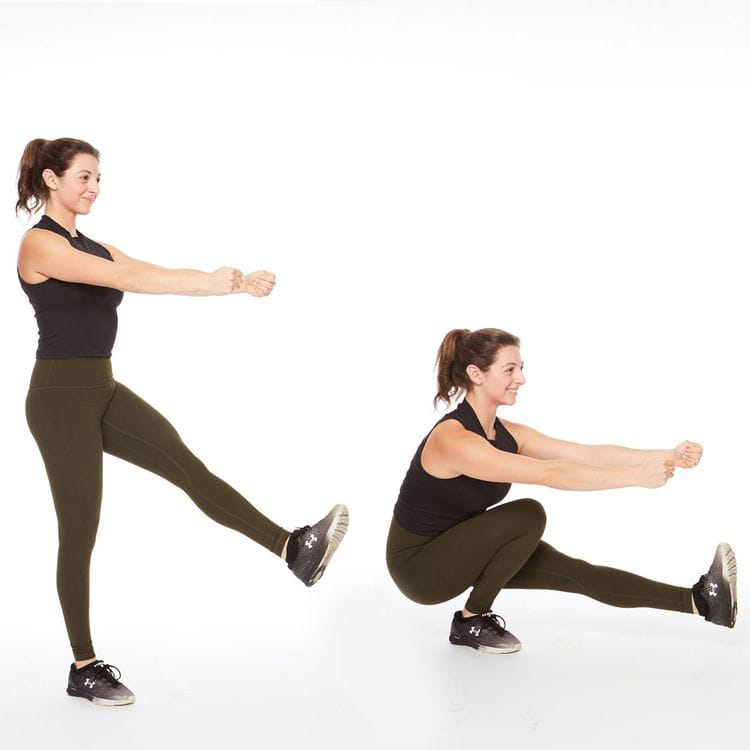
“You cannot cheat on this exercise,” says Michele Olson, Ph.D., professor of exercise physiology at Huntingdon College in Montgomery, Alabama. “This butt workout move takes the best glute activation a squat can offer and the best hip and thigh activation that a lunge can offer all rolled into one truly challenging but oh-so-worth-it exercise!”
To modify this advanced glute exercise, put a chair directly behind you, so you can quickly tap your butt to the edge of the seat. As you progress, you can use objects (such as the bottom of a step) that are lower to the ground.
Do 2 sets of 5 reps on each leg.
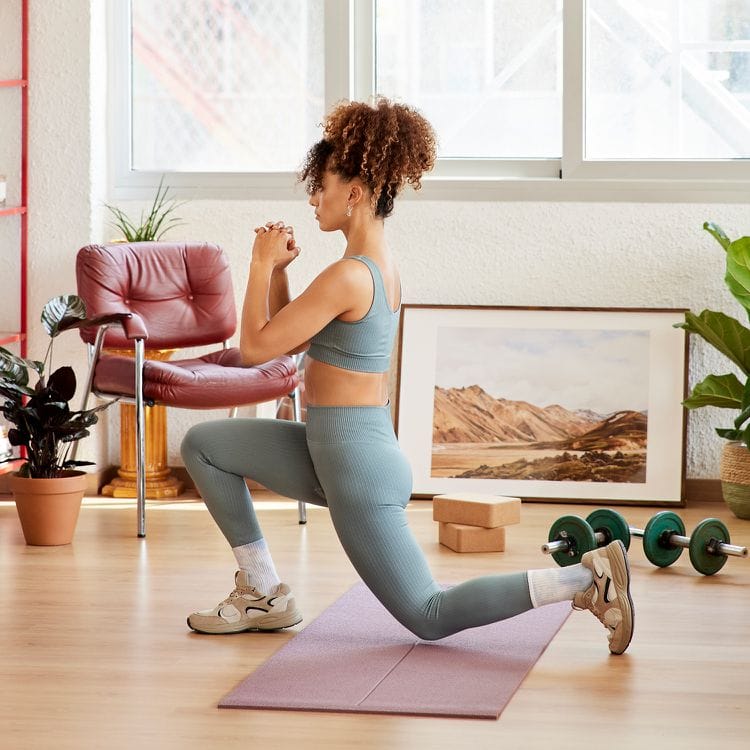
The stationary lunge, also called a split squat, is a classic glute-strengthening move, and was suggested for your butt workout by Cari Shoemate, an ACE-certified personal trainer. Plus, the split stance challenges your balance, making your glutes work even harder. Pro tip: Keep the front heel pressed into the ground and avoid lunging forward — always drop down and up out of the lunge.
Do 3 sets of 15 reps per leg.
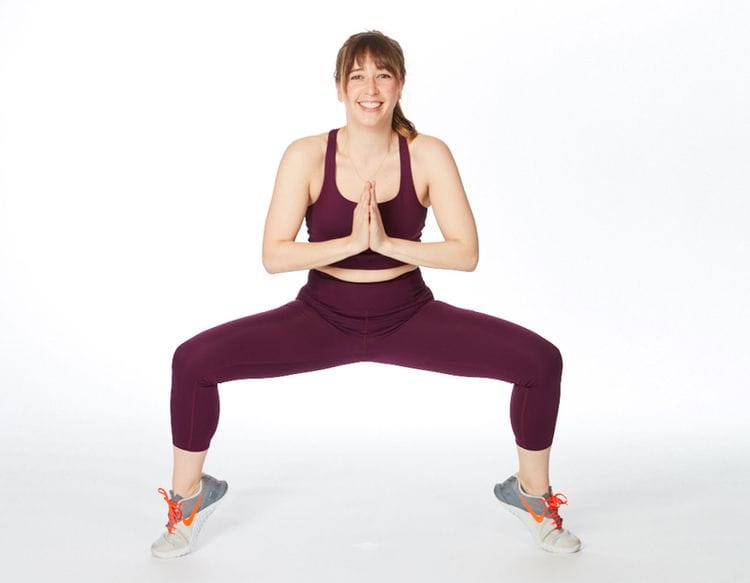
This butt-building exercise not only helps to strengthen your glutes with every rep, but it also targets the inner thighs and calves, thanks to the wide stance and raised heels. To keep your balance on your tippy-toes, make sure to draw the abs in tight while you squat.
Do 3 sets of 15 reps.
Keep in mind that you don’t need to do the fullest expression of each of these poses—you are just starting to move your body and shake off the cobwebs. You can also use these stretches for your home practice, before doing a yoga video, or just to relieve tension at the end of the day.
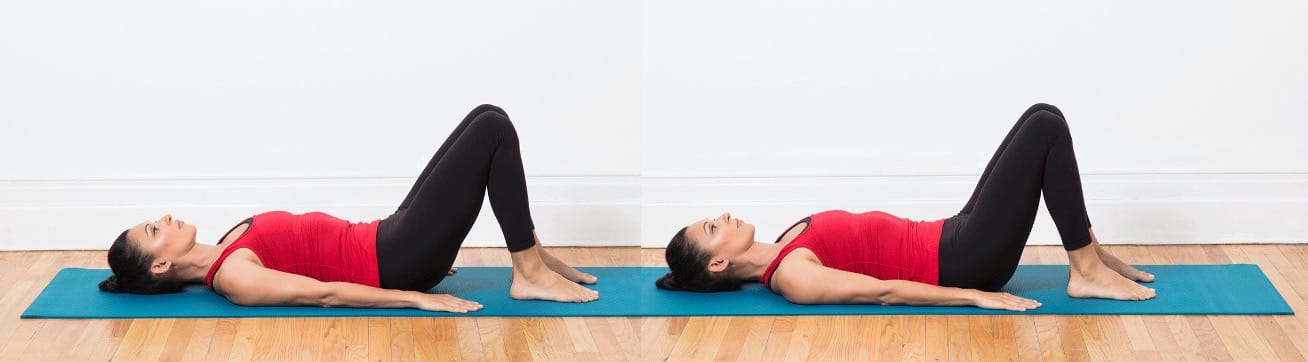
Begin by lying down on your back with your knees bent for a few pelvic tilts.
To do these, press your lower back gently against the floor, tilting your pelvis toward your face, and then release it. It doesn’t sound like much, but this very subtle movement has a wonderful effect on the spine, warming it and getting it moving freely. If you have a stiff back, doing about 20 of these will generally loosen things up.
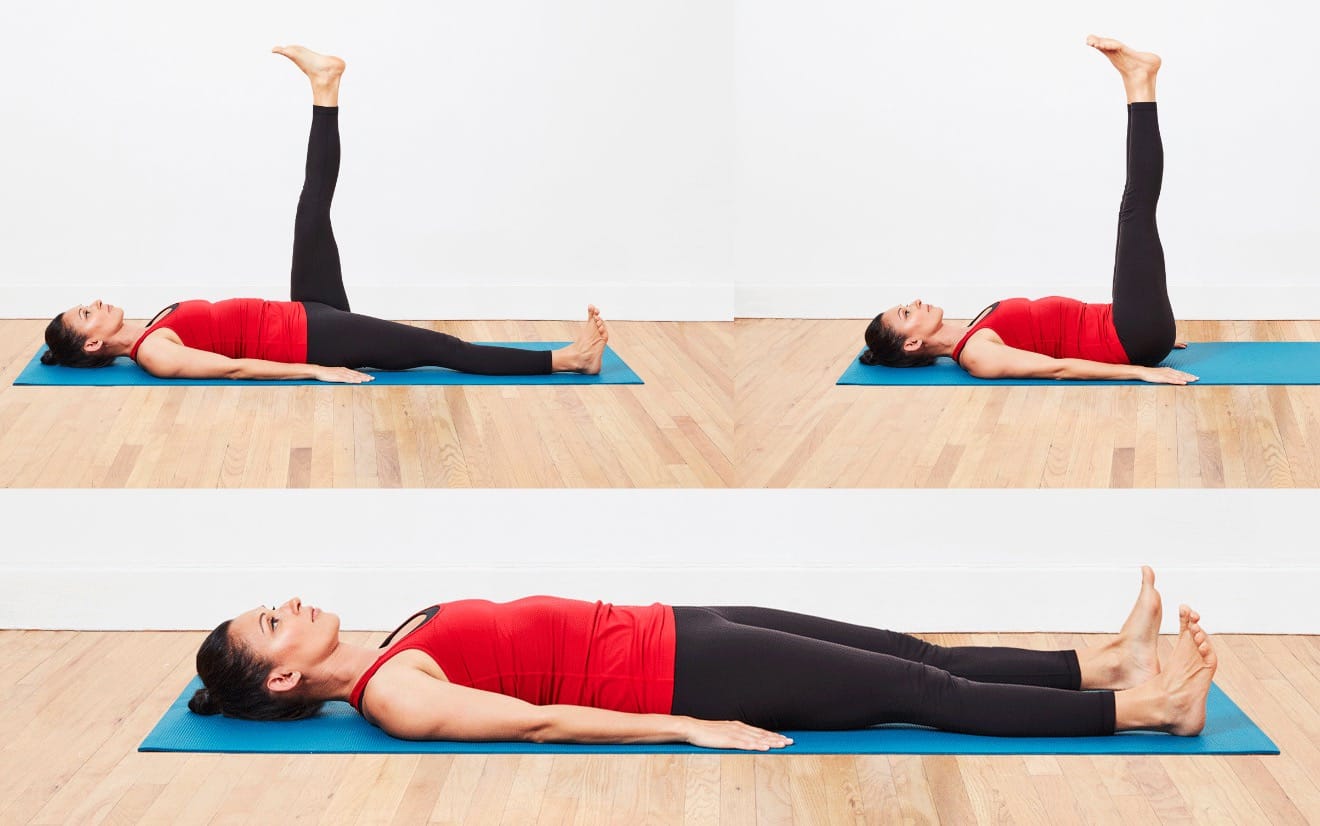
Begin to work your legs by lifting them perpendicular to the floor, either one at a time or both together.
From the pelvic tilt position, lift one leg off the floor and aim the sole of your foot at the ceiling. Keep the other foot on the floor or bring it up to join the first one.
If straightening your legs is a challenge, it’s fine to keep them bent. They also don’t have to come to fully perpendicular; lift them as high as is comfortable for you. Stretching a strap around the sole of your foot may make this position more comfortable.
Once your leg is lifted, begin to strongly flex and then point your foot. Notice how these contrasting positions feel different all the way up your leg. You are beginning to stretch the hamstrings, feet, ankles, calves, and fronts of the shins.
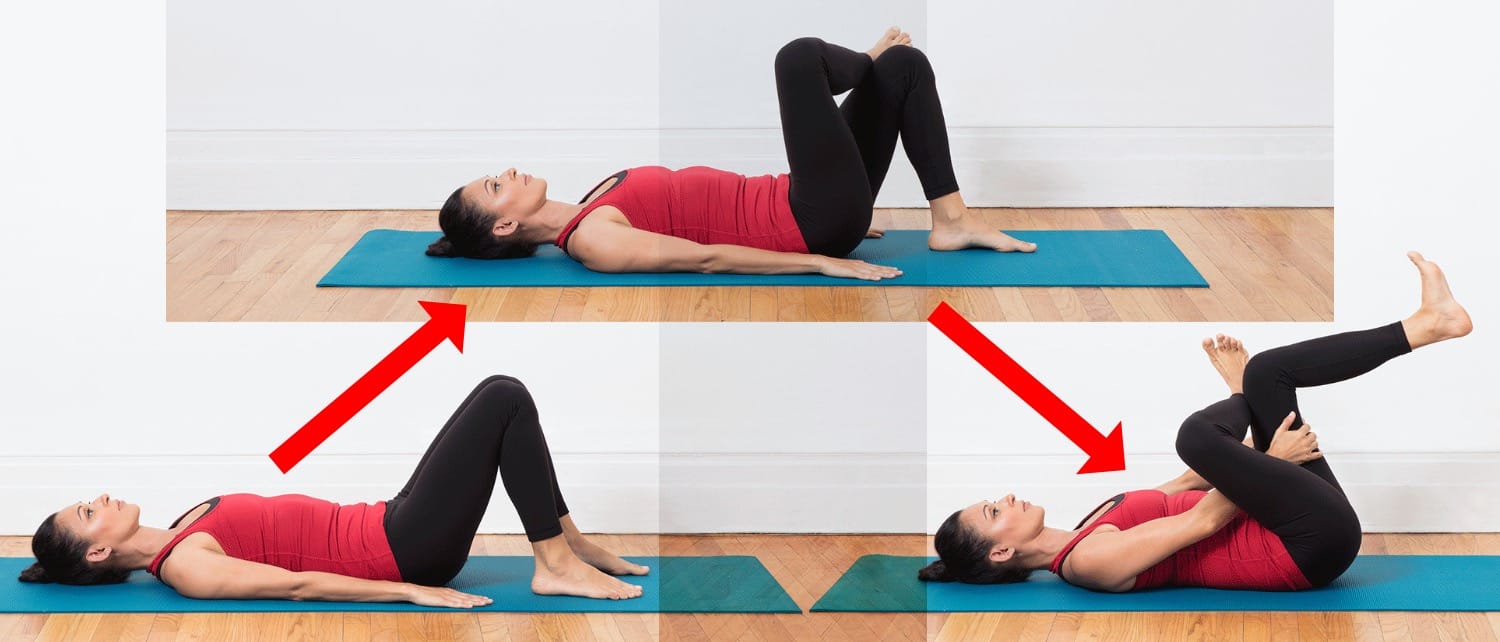
Remaining on your back, cross your right ankle over the opposite knee for the eye of the needle pose (Sucirandhrasana). Since you are just getting started, you can keep your left foot on the floor, especially if you have tight hips.
If you want a bigger stretch, draw your left knee toward your body. Go easy since your hips may be stiff at first. Once you finish on one side switch legs to loosen up the other side.
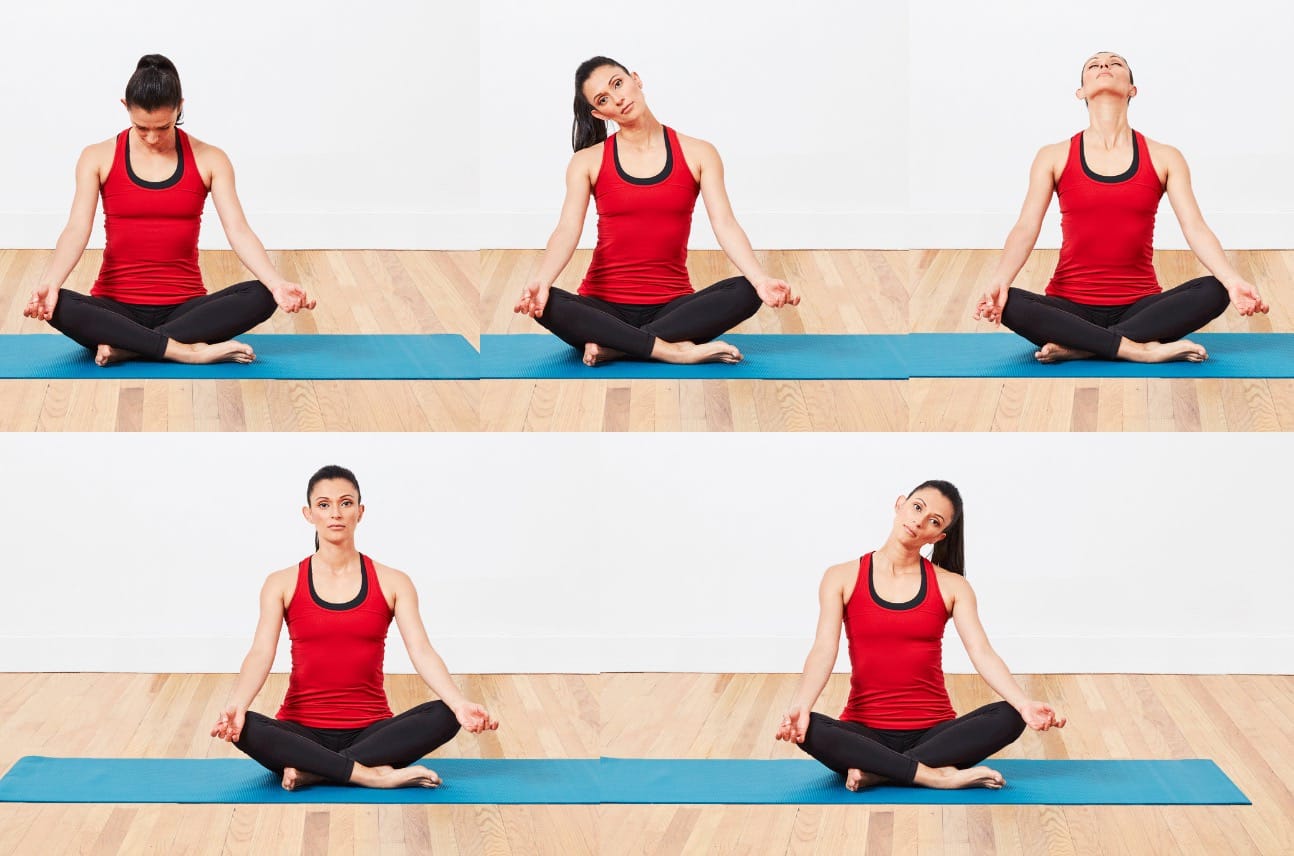
For easy pose (Sukhasana) come up to sit in a comfortable cross-legged position. Place one or two folded blankets under your seat so that your knees are lower than your hips. Do a few neck rolls here.
First, let your chin drop toward your chest. Then roll your chin over to the left shoulder, circle the head back, then bring the chin to the right shoulder. Continue circling slowly, moving through any areas of tightness, for about five rotations. Then do an equal number of rotations in the opposite direction.
If you have trouble with your neck, skip the part where you let the head drop back and just move the chin forward from ear to ear instead.
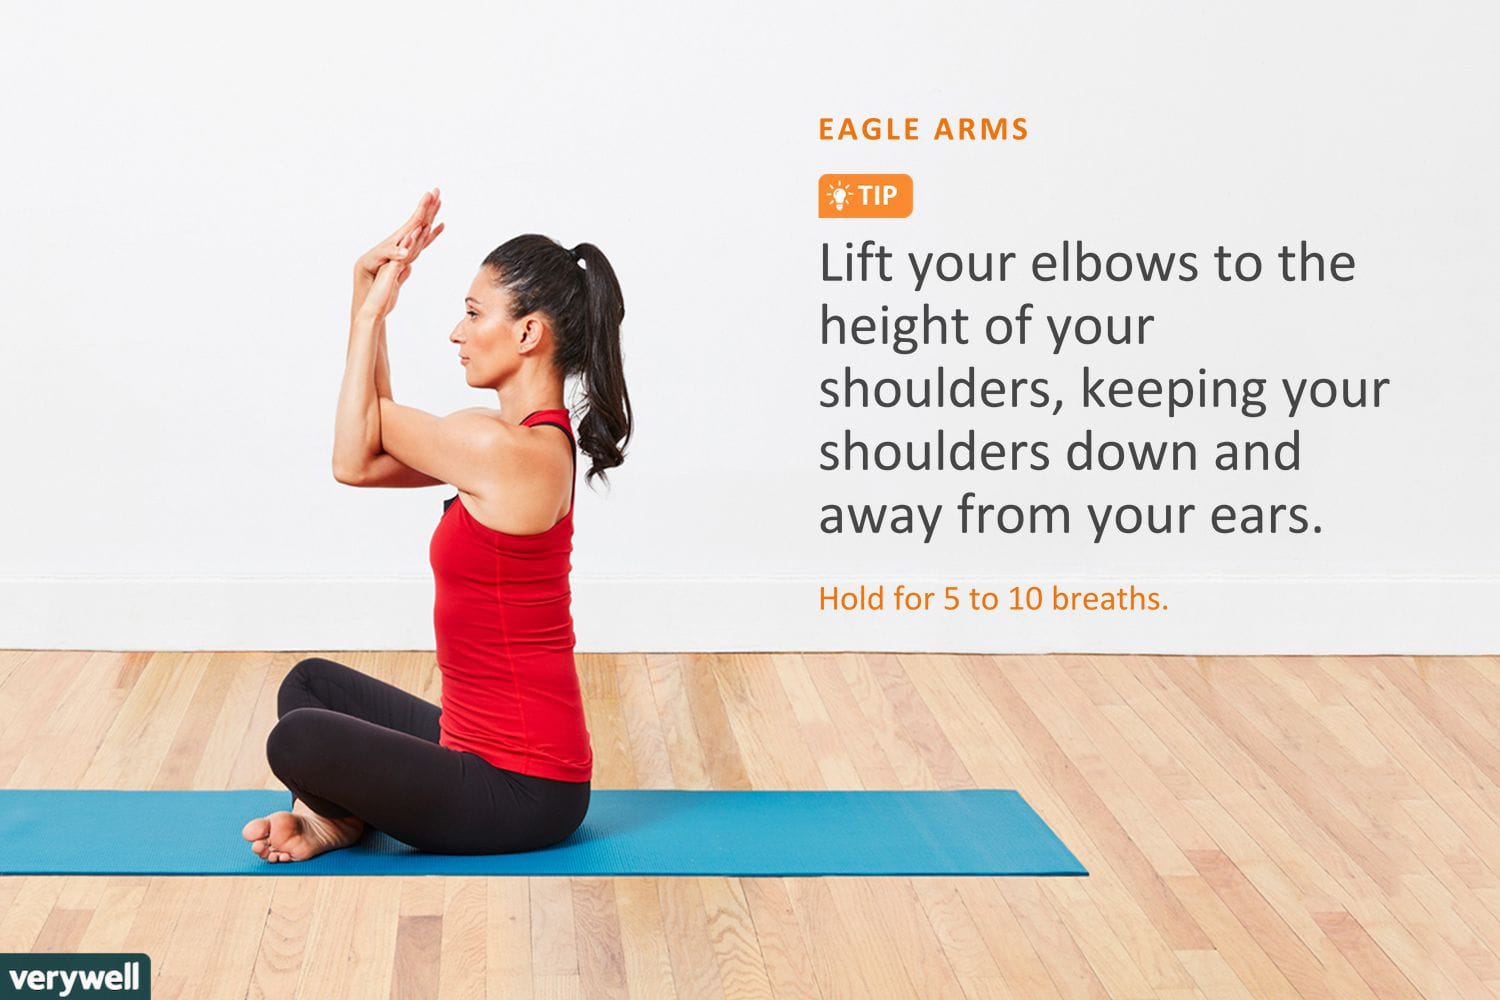
While staying seated in easy pose, take the arm position for eagle pose (arms crossed, bent, and parallel to the floor). This gives you a really nice stretch across the shoulder blades and center of the back, an area that is otherwise hard to stretch.
If you do the position with the right arm on top first, make sure to spend equal time with the left arm on top.
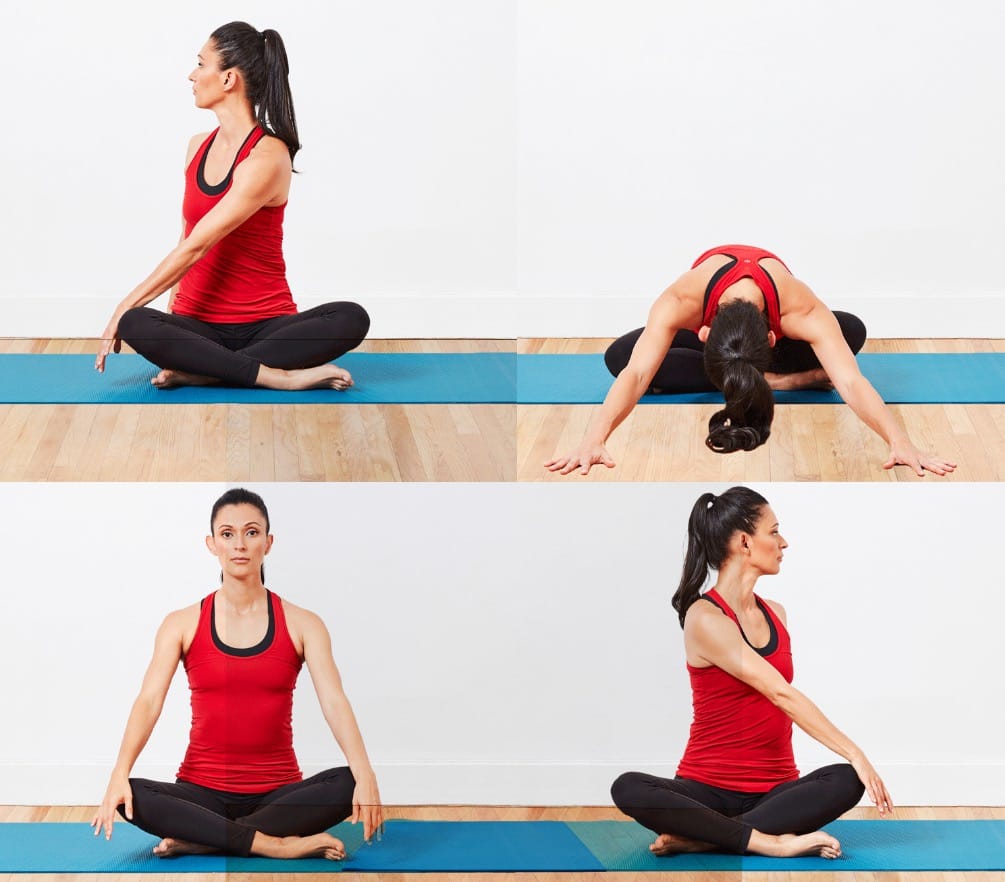
Keep your legs in easy pose and twist to the right, bringing your left hand to your right knee and the right hand behind your back. Take your gaze gently over your left shoulder, then twist to the left, bringing the right hand to your left knee and the left hand behind your back. Remember that this is just a warm up, so this shouldn’t be your deepest twist.
This is also a good place to take your easy pose into a forward bend. Since you’ve been sitting cross-legged for a while, switch the position of your legs so that the opposite leg is in front. You can continue to sit here until class starts or continue with a few more stretches if you have the inclination.
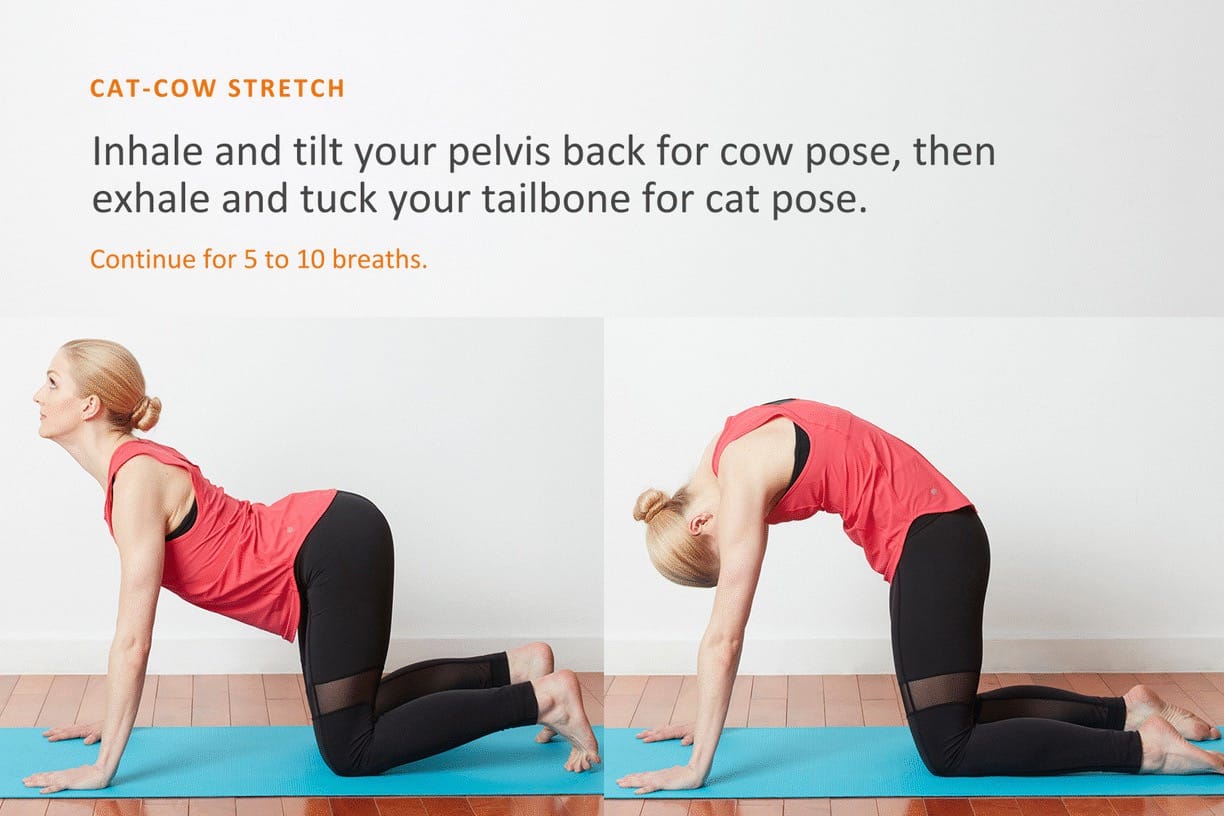
If you still have some time, do a few rounds of cat-cow stretches (on all fours alternating arching and rounding your spine). These will further loosen the spine.
Since you are doing this on your own, take care to synchronize your body to your breath, letting the breath initiate the movement. Begin each motion in your tailbone, letting it ripple up the spine until your head is the last thing to move.
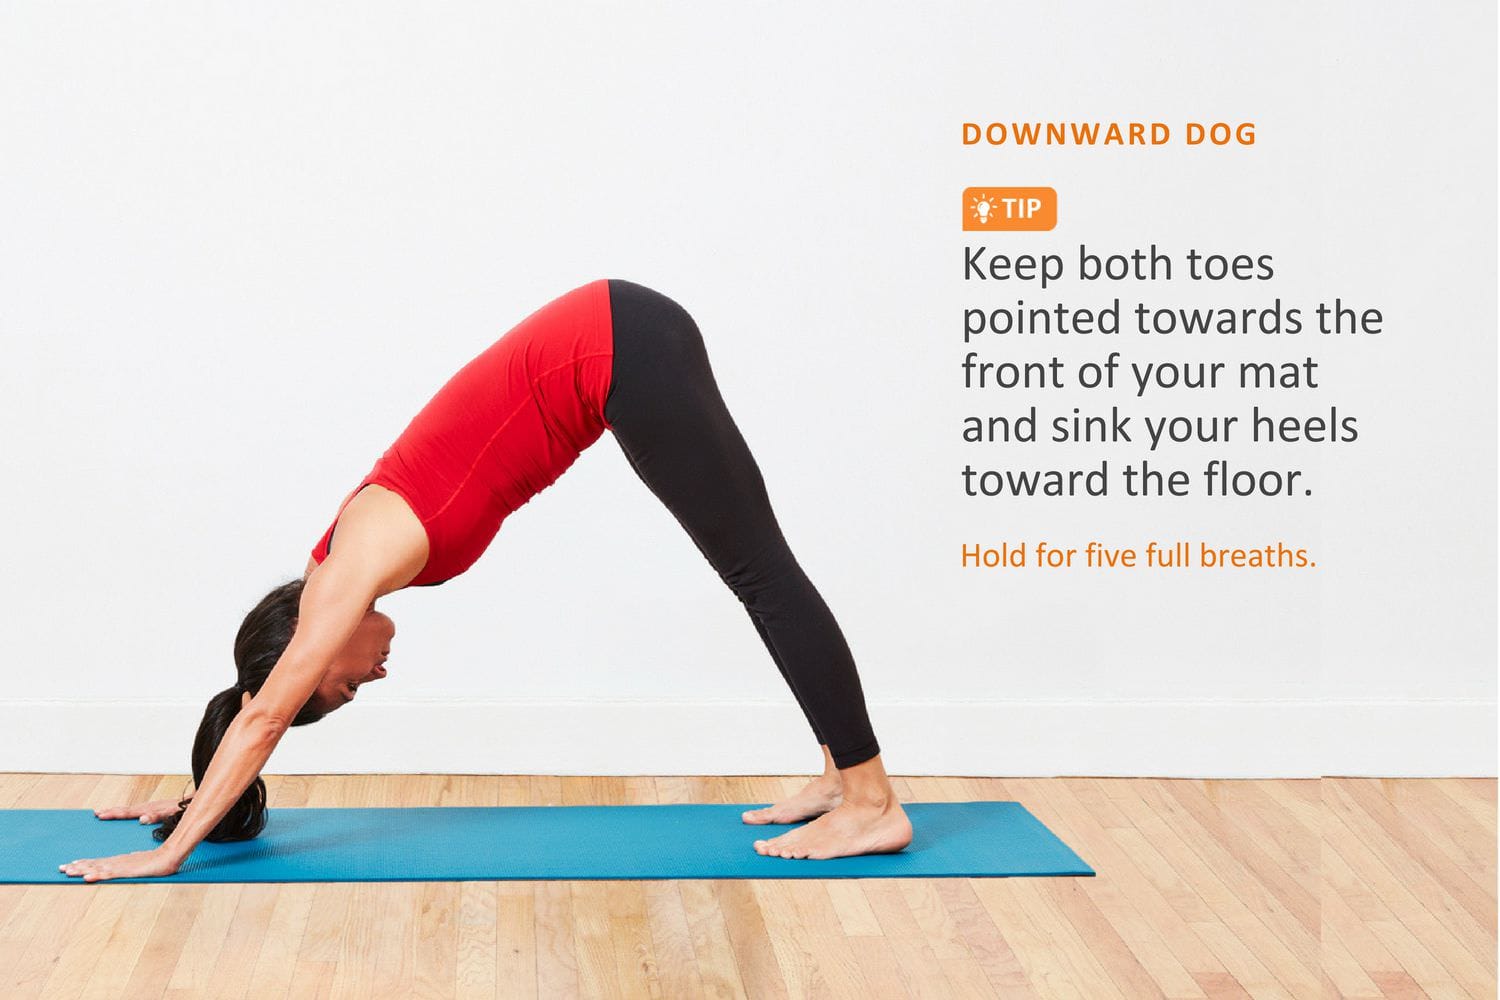
You may want to come into a downward facing dog (Adho Mukha Svanasana), primarily to stretch out the legs one last time. Pedal the heels up and down here to lengthen the calves and hamstrings.
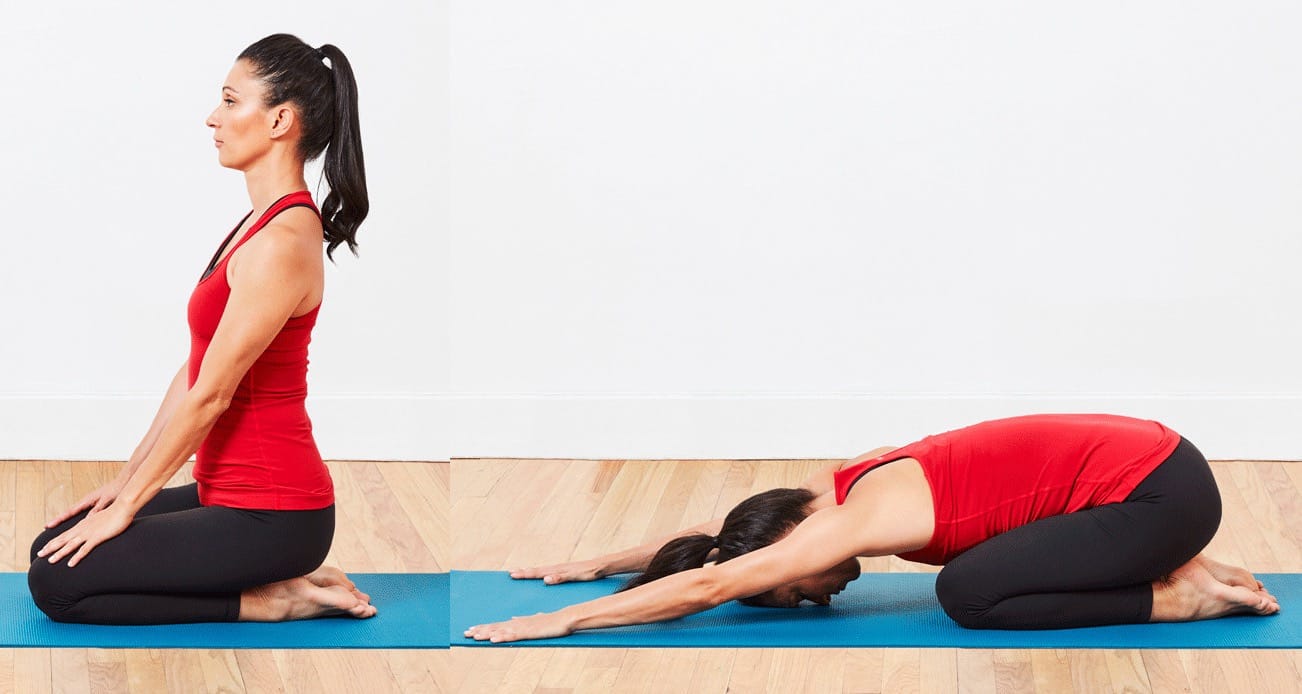
Child’s pose (Balasana) is always a good addition to a warm-up routine. Though often thought of simply as a resting pose, child’s pose also offers a nice stretch for the hips and thighs and gives you a chance to turn your attention inward in preparation for your upcoming class.
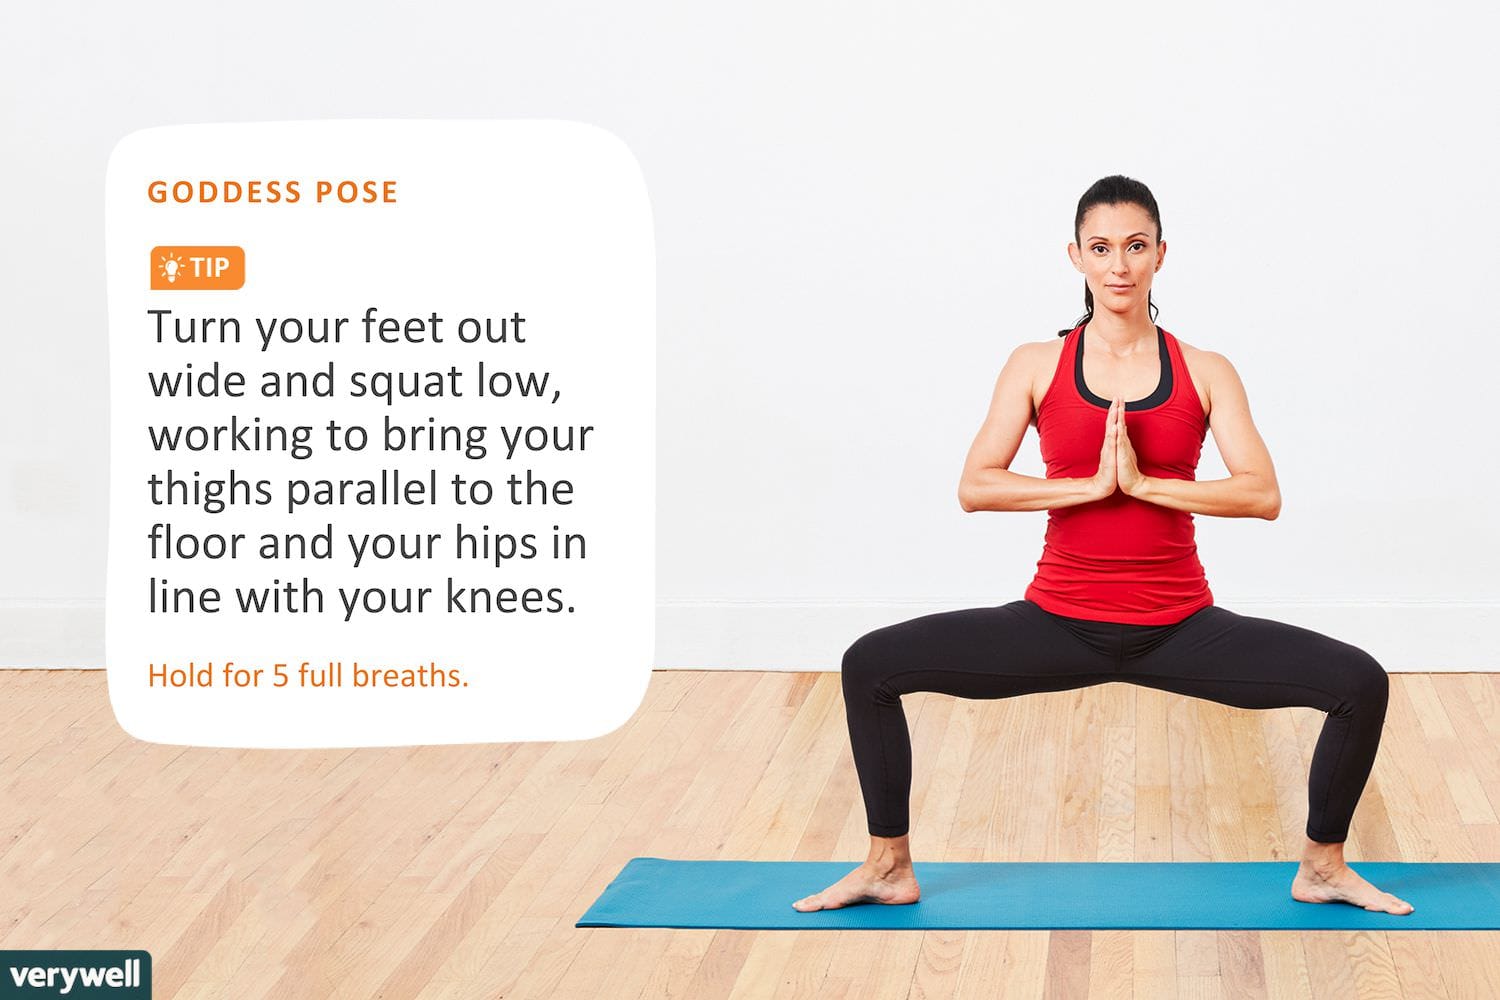
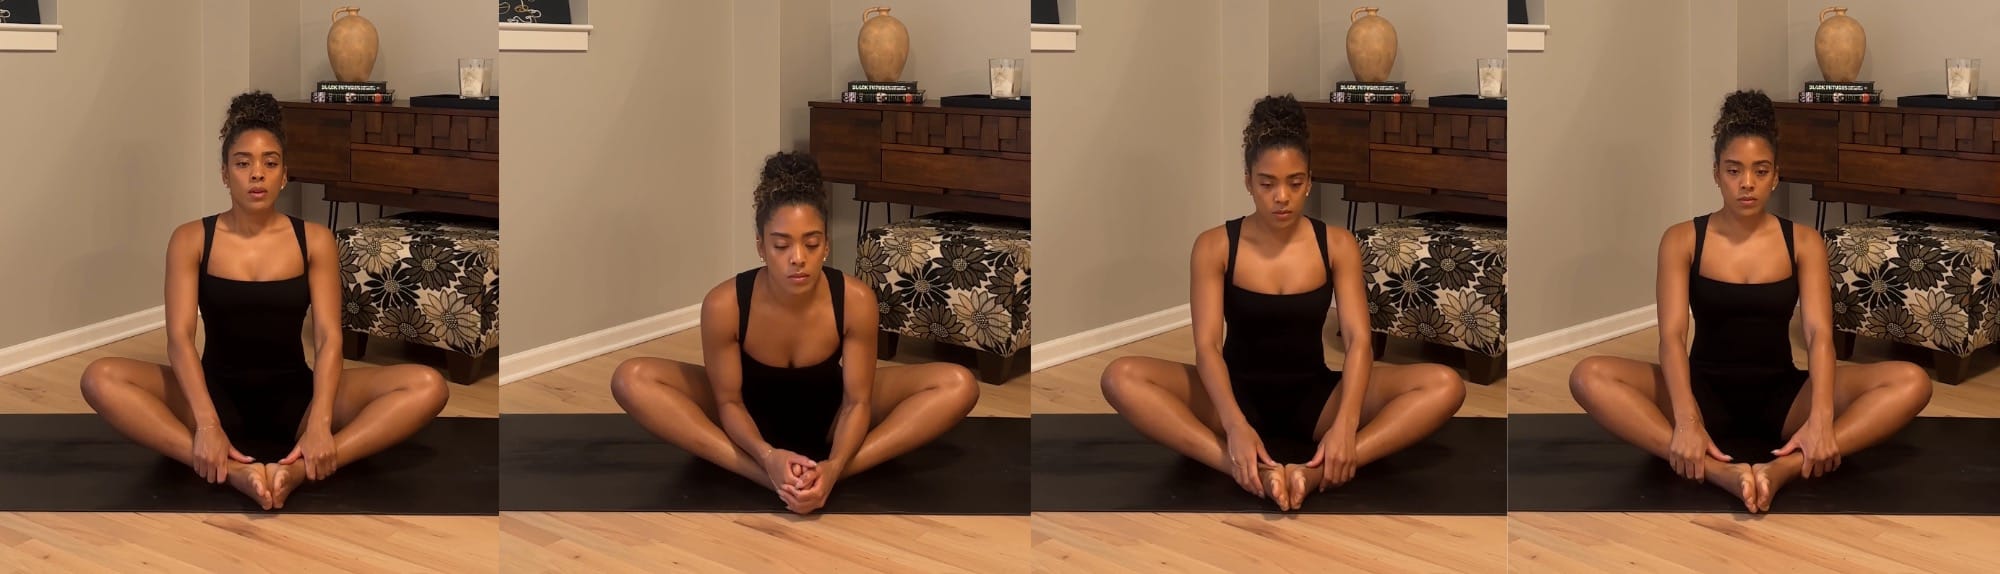
Many people like to await the start of class in goddess pose (Supta Baddha Konasana)—a standing wide-legged squat—to further open the hips, foregoing the previously mentioned poses. If this is your preference, by all means, do it.
You can also come into the seated version of the pose (cobbler’s pose) or just return to easy pose for a few minutes until your class begin
5 reps on each leg
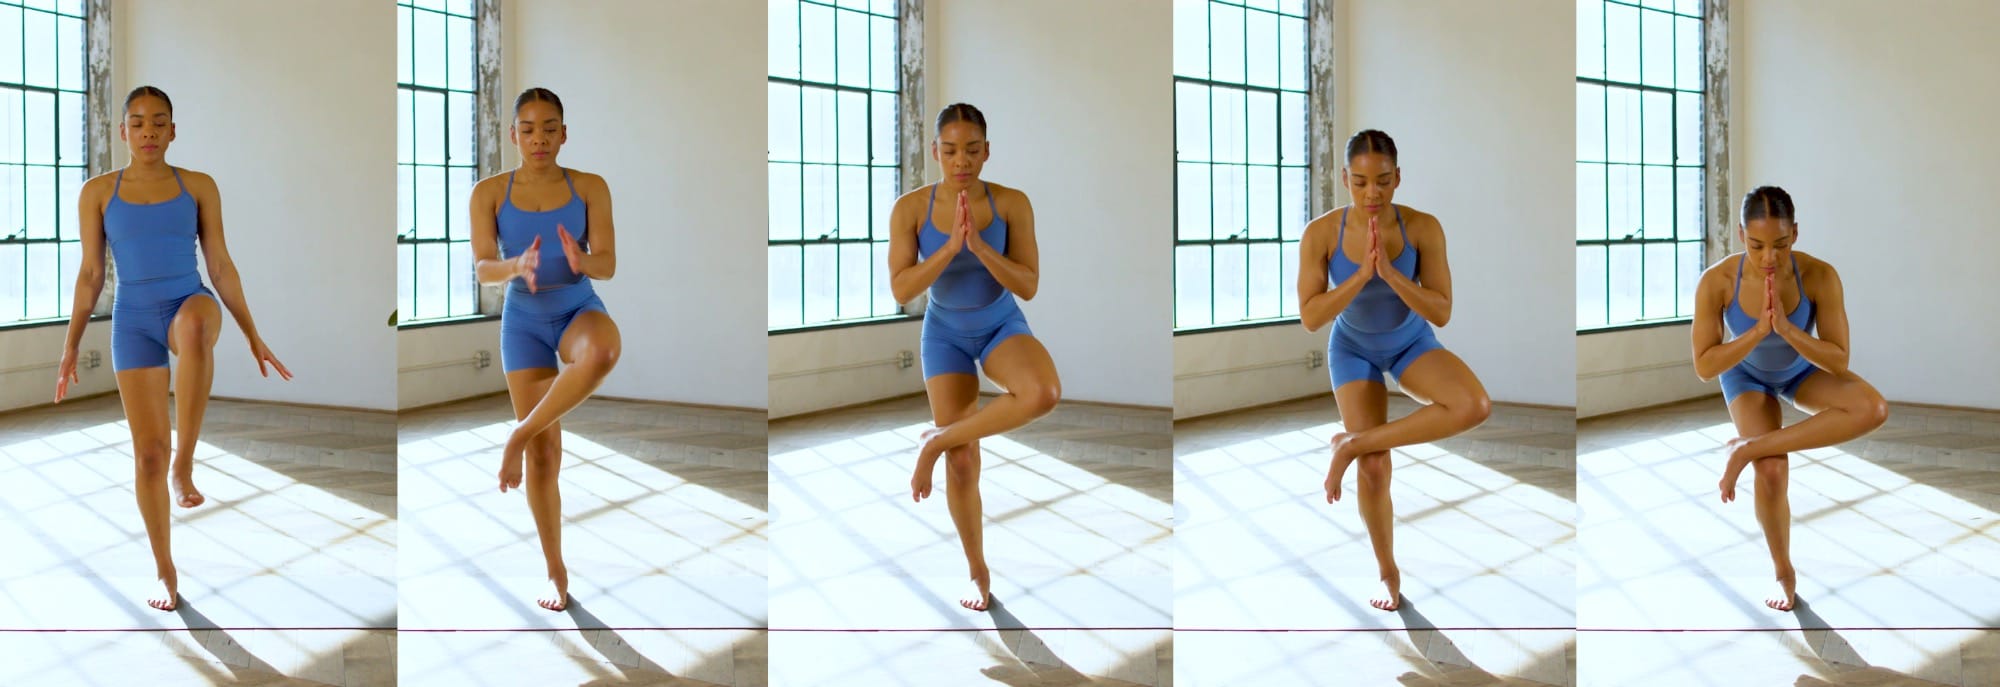
Challenge your balance further with this dynamic exercise. The movement of the non-balancing foot makes focusing on the balance aspect a bit more difficult.
How to Do It: - Stand in one place and set up cones in a “star” formation, with 5 cones in a circle around you. - While balancing on one foot, tap each cone gently with your other foot as you make your way around the star. - Once you’ve tapped all the cones, you’ve completed one rep. - If it’s easy, try it standing on a squishy or unstable surface like an Airex foam pad or a BOSU.
2 to 3 sets of 10 reps for a count of two up, two down
To stabilize a joint, you need to strengthen the muscles that support it. That includes your calf muscles—the two main ones being the gastrocnemius and soleus. This exercise focuses on those.
How to Do It:
2 to 3 sets of 10 reps on each side for a count of two up, two down Once you’re comfortable with the standing heel raises, take it up a notch with this slightly more challenging variation.
How to Do It:
The gastrocnemius and soleus muscles are key muscles for propulsion and power. They act like a wound-up spring storing kinetic energy that, when released, creates an elastic energy to propel you into the air. Squat jumps are a great exercise to strengthen these muscles while also strengthening the glutes, quads and hamstrings.
How to Do It:
3 sets of 10 to 15 seconds per side
Once double pogo hops start to feel comfortable, try them on one leg next. Single leg training helps work out asymmetries in the body, Warner says.
How to Do It:
2 rounds of 60 seconds on each side
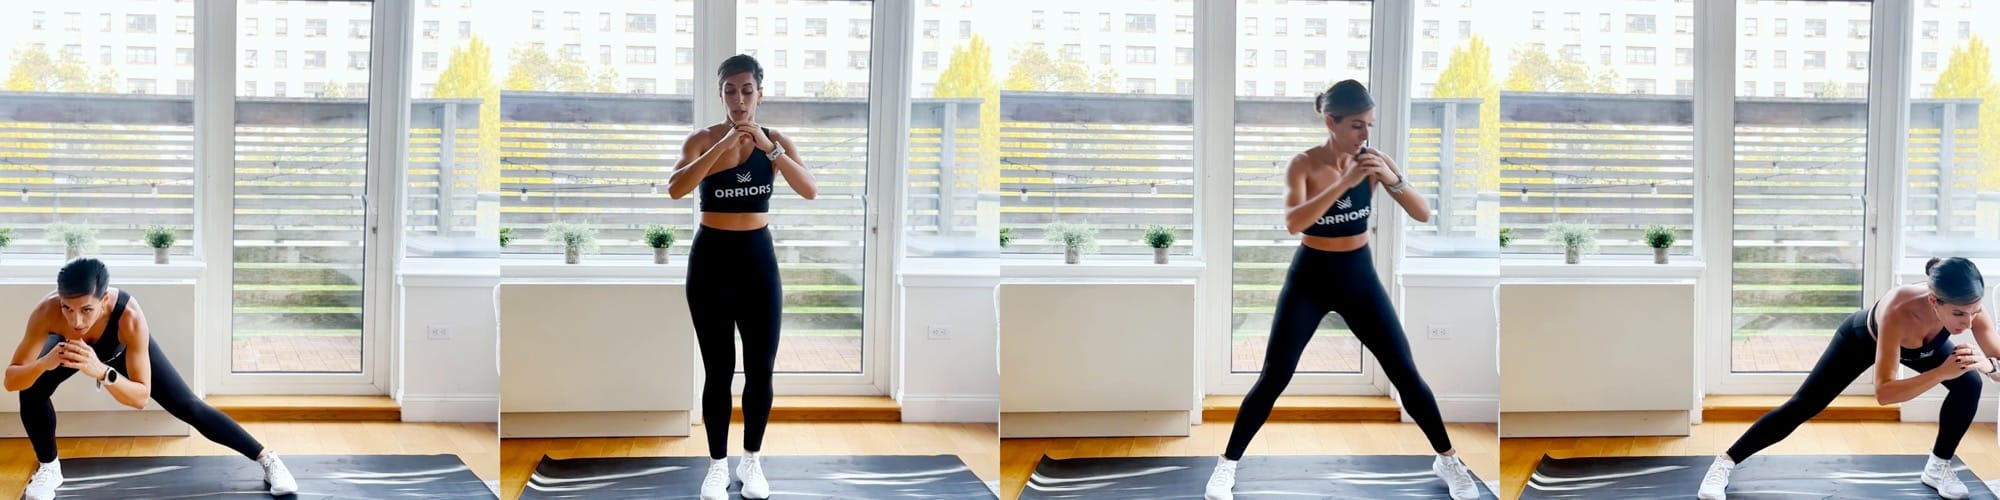
Single-leg lateral jumps are a great way to improve your athleticism and balance. These exercises “develop the ability to explosively move side to side, while training both the tendons and proprioceptive system to land in a stable and safe position,” says Warner.
How to Do It:
2 sets of 60 seconds each side
As Warner said before, incorporating single leg exercises helps address strength differentials between each leg. Now, it’s time to incorporate single leg training in all planes of motion. It’s not enough to just balance on one foot, perfectly still. “Adding trunk and hip rotation to single leg balance trains the ankle to maintain a stable base while twisting or rotating, such as direction changes on the field or court,” says Warner.
How to Do It:
2 to 3 sets of 10 to 15 reps each side
The ankle evertors and inverters power the rotation of the ankle inward and outward. Strengthening these muscles is key in reducing the risk of rolling the ankle, often causing ankle sprains and strains. This exercise requires a resistance band. Tie a small loop at the end of a 3-foot elastic resistance band. Loop your foot into the hole.
How to Do It:
3 sets of 12 reps each side
Lateral steps downs are a functional exercise that you can add into your routine to train single leg stability. If you’re coming off an ankle injury, this movement will also prime your ankles for squatting, “as it moves the ankle through a similar range of motion and works the quads, hip stabilizers, and glutes,” Warner says.
How to Do It:
3 rounds of 15 reps
Dorsiflexion is what allows you to pull your toes up towards your shin. It’s a vital ankle movement. Even though it sounds super basic, training something as simple as dorsiflexion can help improve endurance for running, sprinting, or other sports. It can even help prevent shin splints, says Warner.
How to Do It:
3 sets of 20 seconds
“These are a great introduction to plyometric activities,” Warner says. “They train the ankle to tolerate impact and improve reactive strength, which is an important measure of performance for explosiveness and the ability to change direction quickly.” Incorporate these into your warm up for anything plyometric based to prep the ankles for more intense activity like a HIIT class or a pick up basketball game.
How to Do It:
Not only does this exercise help you warm up your back, it stretches some of the muscles around it, such as the hamstrings, which may also be tight.
HOW TO DO IT: Stand with your feet together without locking your knees. Reach your arms up overhead and look up. Fold forward and reach your hands toward the ground. At the same time, push your hips back and shift your weight into your heels. When you feel that you can’t reach any lower, roll up slowly and reach your arms up. Do 15 of these.
This exercise prevents your lower back from moving too much, emphasizing rotation of the middle segment of your spine, known as the thoracic spine. This segment of the spine is much better at rotating than the lumbar spine, according to a 2008 study in the Journal of Neurosurgery: Spine.
HOW TO DO IT: Start on all fours with your hands under your shoulders and knees under your hips. Rock your butt back onto your heels, keeping your hands planted. Put your right hand behind your head and turn your shoulders and head to the right as far as possible as you exhale. Come back to the center and switch sides. Do 10 rotations on each side.
In this exercise, you’ll reach your arms up and pretend you’re climbing a ladder to practice bending your spine side-to-side.
HOW DO TO IT: Stand with a tall posture and reach your arms high up. Reach with your arms, one at a time, alternating each time. The goal is to reach as high as possible moving your shoulders and spine to help you reach higher. Perform 10 reaches with each arm.
Not only does this exercise help you warm up your back, it also stretches your hips and shoulders.
HOW DO TO IT: Take a large, lunging step forward with your right foot. Bend the right knee to drop down into a lunge position. Place the left hand on the ground. Turn your shoulders and torso toward the right leg and reach your right arm up toward the ceiling. Perform five repetitions on each side.
Stretch your hips, back and shoulders with this all-encompassing stretch.
HOW TO DO IT: Start in a push-up position. Plant your left foot next to your left hand. Turn to the left and raise your left arm up toward the ceiling. Return to a push-up position. Repeat on the right side. Do 10 repetitions on each side.