Martin Gontovnikas | February 26, 2015
When I build a Single Page Application (SPA), I need to somehow concatenate, minify and compress all my JS, CSS and Image files for production while keeping them as they oringinally are for development. Also, I’d like my app to continually redeploy on each change I do while I’m coding.
Before Grunt existed, I thought that doing this in an easy and manteinable way was impossible. That’s why I thought Grunt was the holly grail for build tools. But then, Gulp appeared. Now I could have all the pipeline of transformations that happens to certain type of files in only one place. It was so much easier to understand than Grunt. And then again, now I thought Gulp was the holly grail.
But what if none of this complex build tools are needed and we can just do the same with less code making it more manteinable and easier to use? This is what we’re going to be talking about in this post!
Let’s start from the begining. A few months back, I built a seed
project for creating Single Page Apps (SPAs) without any framework at
all. For this project, I created what I thought was a simple
Gulpfile.js.
// Uses browserify node.js package
function bundle(browserified, env) {
  browserified
    .bundle()
    .pipe(source('build.js'))
    .pipe(gulp.dest('./build/'));
}


function browserifyTask(env) {
  return function() {
    var file = path.resolve('index.js');
    var browserified = browserify(watchify.args);

    if (env === 'prod') {
      browserified.transform({global: true}, 'uglifyify');
    }
    if (env === 'dev') {
       browserified = watchify(browserified);
       browserified.on('update', function(){
        bundle(browserified, env);
      });
    }

    browserified.transform(stringify(['.html']));
    bundle(browserified.add(file), env);
  }
}

// Uses Rework node.js package
gulp.task('reworkcss', function() {
  var file = path.resolve('index.css');
  var source = path.relative(__dirname, file);
  var output = fs.createWriteStream('build/build.css');
  var contents = fs.readFileSync(file, {encoding: 'utf8'});

  // Initialize and pluginize `rework`
  var css = rework(contents);
  css.use(npmRework());

  // write result
  output.write(css.toString())
  output.end();
});

// Calls browserify function
gulp.task('browserify-dev', browserifyTask('dev'));

// Uses gulp-serve to serve the directory
gulp.task('serve', serve(__dirname));

// Calls browserify, rework and then serves
gulp.task('watch', ['browserify-dev', 'reworkcss', 'serve']);
Basically, it had the watch
task which took care of calling
browserify and apply the needed transformations as well
as using
rework for CSS requires and finally serving
the build/ folder.
Gulp in its core is really simple!. It just provides a way of
creating a stream from several source files and then pipe it through
different transformations. Usually, those transformations are either
just regular node.js packages like browserify,
rework and watchify or simple wrappers
that makes regular node.js packages work with stream like gulp-serve
which is just a wrapper on top of serve.
I was really happy about what I had implemented since my Gulpfile was
just 82 lines of code and the code was really clear. I didn’t have to be
in the lookout for all of those baseDir and
dest folders to understand what was going on like I used to
do with Grunt.
This week, I decided to update that seed project to make it work with
React for templating instead of Ripple. While doing so, I decided to try
out using the package.json to accomplish the same tasks I
was doing with Gulp as well as a few more.
Side note: I’ll be talking about the seed project in an upcoming post.
I want to focus now on the scripts
section of the package.json. Notice first that it’s
just 9 (yes 9!) lines of code! And I thought that 82 LOC from Gulp were
awesome!
"scripts": {
  "start": "npm run build-js && npm run build-css && serve .",
  "watch": "npm run watch-js & npm run watch-css & serve .",

  "build-css": "rework-npm index.css | cleancss -o build/build.css",
  "build-js": "browserify --extension=.jsx --extension=.js index.js | uglifyjs > build/build.js",

  "watch-js": "watchify --extension=.jsx --extension=.js index.js -o build/build.js --debug --verbose",
  "watch-css": "nodemon -e css --ignore build/build.css --exec 'rework-npm index.css -o build/build.css'"
}
Let’s analyze what we’re doing there! The equivalent of the previous
watch function is this
line which basically just calls simultaneously (notice it’s doing
& and not &&) 2 other tasks from
the package.json and the serve function which
is installed as a dev
dependency.
Most node.js utilities we use with Gulp usually provide a
CLI interface as well. serve is one of those
cases. When we install it as a dev dependency, the CLI
executable is put into node_modules/bin which can be just
run by calling it from the package.json’s’
scripts (like we’re doing in the watch
task).
Now, let’s checkout the watch-js
and watch-css tasks. They both just call the cli for
watchify, nodemon and rework
which were installed as dev dependencies as well.
Finally, let’s take a look at the build-js
task. We can see that it’s using a cool feature that most node.js
CLIs provide: If you don’t set an output file, you can just
pipe the response to another command, just like you regularly do with
any regular UNIX command. In this case, we’re first using
browserify to handle all the requires and output one
concatenated file and then pass its output to uglify to
minify this. It’s basically the same as what we’re doing with Gulp when
we call the .pipe() method, but using UNIX command line
features instead.
Suming up, if we take a look at our package.json, we’re
just calling CLI interfaces for node.js packages which we
installed as dev dependencies and then piping the content of calling one
of them to another. We accomplished the same we did with Gulp but with
less, much simpler and easier to mantain code.
I’m not saying Gulp is never going to be needed. But for most cases
that we use it (which are quite simple), we can just use the
package.json or even a Makefile.
What do you guys think about it? Are you willing to try this aproach out?
Task runners are the heroes (or villains, depending on your point of view) that quietly toil behind most web and mobile applications. Task runners provide value through the automation of numerous development tasks such as concatenating files, spinning up development servers and compiling code. In this article, we’ll cover Grunt, Gulp, Webpack and npm scripts. We’ll also provide some examples of each one to get you started. Near the end, I’ll throw out some easy wins and tips for integrating ideas from this post into your application.
There is a sentiment that task runners, and JavaScript advances in general, are over-complicating the front-end landscape. I agree that spending the entire day tweaking build scripts isn’t always the best use of your time, but task runners have some benefits when used properly and in moderation. That’s our goal in this article, to quickly cover the basics of the most popular task runners and to provide solid examples to kickstart your imagination regarding how these tools can fit in your workflow.
Task runners and build tools are primarily command-line tools.
Throughout this article, I’ll assume a decent level of experience and
competence in working with the command line. If you understand how to
use common commands like cd, ls,
cp and mv, then you should be all right as we
go through the various examples. If you don’t feel comfortable using
these commands, a great introductory
post is available on Smashing Magazine. Let’s kick things off with
the granddaddy of them all: Grunt.
Grunt was the first popular
JavaScript-based task runner. I’ve been using Grunt in some form since
2012. The basic idea behind Grunt is that you use a special JavaScript
file, Gruntfile.js, to configure various plugins to
accomplish tasks. It has a vast ecosystem of plugins and is a very
mature and stable tool. Grunt has a fantastic web directory that
indexes the majority of plugins (about 5,500 currently). The simple
genius of Grunt is its combination of JavaScript and the idea of a
common configuration file (like a makefile), which has allowed many more
developers to contribute to and use Grunt in their projects. It also
means that Grunt can be placed under the same version control system as
the rest of the project.
Grunt is battle-tested and stable. Around the time of writing, version 1.0.0 was released, which is a huge accomplishment for the Grunt team. Because Grunt largely configures various plugins to work together, it can get tangled (i.e. messy and confusing to modify) pretty quickly. However, with a little care and organization (breaking tasks into logical files!), you can get it to do wonders for any project.
In the rare case that a plugin isn’t available to accomplish the task you need, Grunt provides documentation on how to write your own plugin. All you need to know to create your own plugin is JavaScript and the Grunt API. You’ll almost never have to create your own plugin, so let’s look at how to use Grunt with a pretty popular and useful plugin!
Let’s look at how Grunt actually works. Running grunt in
the command line will trigger the Grunt command-line program that looks
for Gruntfile.js in the root of the directory. The
Gruntfile.js contains the configuration that controls what
Grunt will do. In this sense, Gruntfile.js can be seen as a
kind of cookbook that the cook (i.e. Grunt, the program) follows; and,
like any good cookbook, Gruntfile.js will contain many
recipes (i.e. tasks).
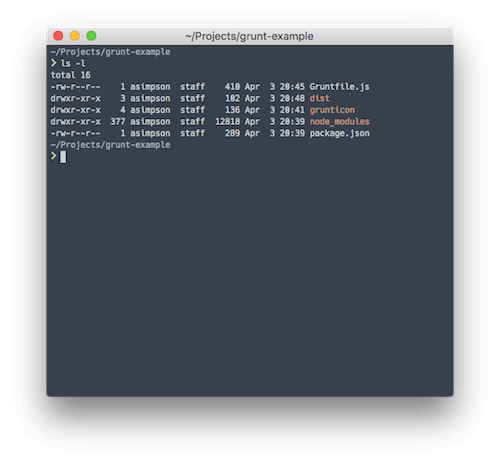
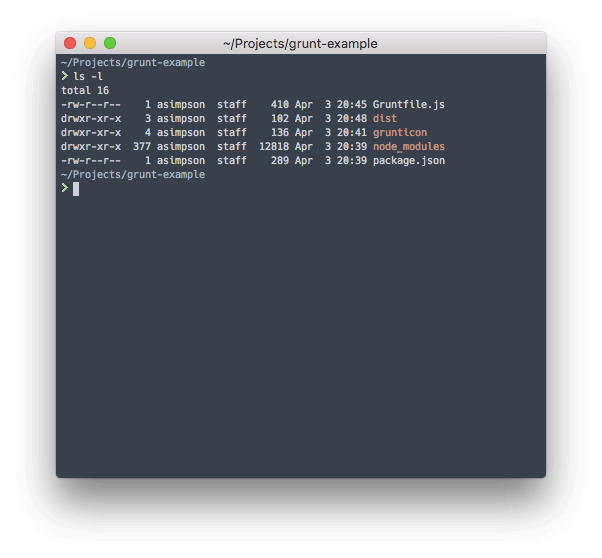
We’re going to put Grunt through the paces by using the Grunticon plugin to generate icons for a hypothetical web app. Grunticon takes in a directory of SVGs and spits out several assets:
The three different files represent the various capabilities of browsers and mobile devices. Modern devices will receive the high-resolution SVGs as a single request (i.e. a single CSS file). Browsers that don’t handle SVGs but handle base-64-encoded assets will get the base-64 PNG style sheet. Finally, any browsers that can’t handle those two scenarios will get the “traditional” style sheet that references PNGs. All this from a single directory of SVGs!
The configuration of this task looks like this:
module.exports = function(grunt) {

  grunt.config("grunticon", {
    icons: {
      files: [
        {
          expand: true,
          cwd: 'grunticon/source',
          src: ["*.svg", ".png"],
          dest: 'dist/grunticon'
        }
      ],
      options: [
        {
          colors: {
            "blue": "blue"
          }
        }
      ]
    }
  });

  grunt.loadNpmTasks('grunt-grunticon');
};
Let’s walk through the various steps here:
Gruntfile.js file in the root of the
project. It’s best to also install Grunt as an npm dependency in your
package.json file along with Grunticon via
npm i grunt grunt-grunticon --save-dev.head of your HTML, which will determine
what icons to load.Here is what your directory should look like before you run the Grunticon task:
|-- Gruntfile.js
|-- grunticon
|   `-- source
|       `-- logo.svg
`-- package.json
Once those things are installed and created, you can copy the code
snippet above into Gruntfile.js. You should then be able to
run grunt grunticon from the command line and see your task
execute.
The snippet above does a few things:
config object to Grunt on line 32 named
grunticon;icons object;loadNPMTasks.Here is what your directory should look like post-Grunticon:
|-- Gruntfile.js
|-- dist
|   `-- grunticon
|       |-- grunticon.loader.js
|       |-- icons.data.png.css
|       |-- icons.data.svg.css
|       |-- icons.fallback.css
|       |-- png
|       |   `-- logo.png
|       `-- preview.html
|-- grunticon
|   `-- source
|       `-- logo.svg
`-- package.json
There you go — finished! In a few lines of configuration and a couple of package installations, we’ve automated the generation of our icon assets! Hopefully, this begins to illustrate the power of task runners: reliability, efficiency and portability.
Gulp emerged sometime after Grunt and aspired to be a build tool that wasn’t all configuration but actual code. The idea behind code over configuration is that code is much more expressive and flexible than the modification of endless config files. The hurdle with Gulp is that it requires more technical knowledge than Grunt. You will need to be familiar with the Node.js streaming API and be comfortable writing basic JavaScript.
Gulp’s use of Node.js streams is the main reason it’s faster than Grunt. Using streams means that, instead of using the file system as the “database” for file transformations, Gulp uses in-memory transformations. For more information on streams, check out the Node.js streams API documentation, along with the stream handbook.
As in the Grunt section, we’re going to put Gulp through the paces with a straightforward example: concatenating our JavaScript modules into a single app file.
Running Gulp is the same as running Grunt. The gulp
command-line program will look for the cookbook of recipes
(i.e. Gulpfile.js) in the directory in which it’s run.
Limiting the number of requests each page makes is considered a web performance best practice (especially on mobile). Yet collaborating with other developers is much easier if functionality is split into multiple files. Enter task runners. We can use Gulp to combine the multiple files of JavaScript for our application so that mobile clients have to load a single file, instead of many.
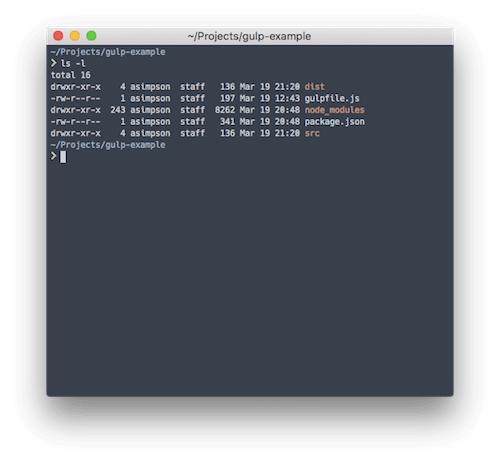
Gulp has the same massive ecosystem of plugins as Grunt. So, to make this task easy, we’re going to lean on the gulp-concat plugin. Let’s say our project’s structure looks like this:
|-- dist
|   `-- app.js
|-- gulpfile.js
|-- package.json
`-- src
    |-- bar.js
    `-- foo.js
Two JavaScript files are in our src directory, and we
want to combine them into one file, app.js, in our
dist/ directory. We can use the following Gulp task to
accomplish this.
var gulp = require('gulp');
var concat = require('gulp-concat');

gulp.task('default', function() {
  return gulp.src('./src/*.js')
    .pipe(concat('app.js'))
    .pipe(gulp.dest('./dist/'));
});
The important bits are in the gulp.task callback. There,
we use the gulp.src
API to get all of the files that end with .js in our
src directory. The gulp.src API returns a
stream of those files, which we can then pass (via the pipe
API) to the gulp-concat plugin. The plugin then concatenates all of
the files in the stream and passes it on to the gulp.dest
function. The gulp-dest function simply writes the input it
receives to disk.
You can see how Gulp uses streams to give us “building blocks” or “chains” for our tasks. A typical Gulp workflow looks like this:
dest block, which ends our chain).As in the Grunt example, simply running gulp from the
root of our project directory will trigger the default task
defined in the Gulpfile.js file. This task concatenates our
files and let’s us get on with developing our app or website.
The newest addition to the JavaScript task runner club is Webpack. Webpack bills itself as a “module bundler,” which means it can dynamically build a bundle of JavaScript code from multiple separate files using module patterns such as the CommonJS pattern. Webpack also has plugins, which it calls loaders.
Webpack is still fairly young and has rather dense and confusing documentation. Therefore, I’d recommend Pete Hunt’s Webpack repository as a great starting point before diving into the official documentation. I also wouldn’t recommend Webpack if you are new to task runners or don’t feel proficient in JavaScript. Those issues aside, it’s still a more specific tool than the general broadness of Grunt and Gulp. Many people use Webpack alongside Grunt or Gulp for this very reason, letting Webpack excel at bundling modules and letting Grunt or Gulp handle more generic tasks.
Webpack ultimately lets us write Node.js-style code for the browser, a great win for productivity and making a clean separation of concerns in our code via modules. Let’s use Webpack to achieve the same result as we did with the Gulp example, combining multiple JavaScript files into one app file.
Webpack is often used with Babel to
transpile ES6 code to ES5. Transpiling code from ES6 to ES5 lets
developers use the emerging ES6 standard while serving up ES5 to
browsers or environments that don’t fully support ES6 yet. However, in
this example, we’ll focus on building a simple bundle of our two files
from the Gulp example. To begin, we need to install Webpack and create a
config file, webpack.config.js. Here’s what our file looks
like:
module.exports = {
    entry: "./src/foo.js",
    output: {
        filename: "app.js",
        path: "./dist"
    }
};
In this example, we’re pointing Webpack to our
src/foo.js file to begin its work of walking our dependency
graph. We’ve also updated our foo.js file to look like
this:
//foo.js
var bar = require("./bar");

var foo = function() {
  console.log('foo');
  bar();
};

module.exports = foo;
And we’ve updated our bar.js file to look like this:
//bar.js
var bar = function() {
  console.log('bar');
};

module.exports = bar;
This is a very basic CommonJS example. You’ll notice that these files
now “export” a function. Essentially, CommonJS and Webpack allow us to
begin organizing our code into self-contained modules that can be
imported and exported throughout our application. Webpack is smart
enough to follow the import and export keywords and to bundle everything
into one file, dist/app.js. We no longer need to maintain a
concatenation task, and we simply need to adhere to a structure for our
code instead. Much better!
Webpack is akin to Gulp in that “It’s just JavaScript.” It can be
extended to do other task runner tasks via its loader system. For
instance, you can use css-loader and sass-loader to
compile Sass into CSS and even to use the Sass in your JavaScript by overloading
the require CommonJS pattern! However, I typically
advocate for using Webpack solely to build JavaScript modules and for
using another more general-purpose approach for task running (for
example, Webpack and npm scripts or Webpack and Gulp to handle
everything else).
npm scripts are the latest hipster craze, and for good reason. As we’ve seen with all of these tools, the number of dependencies they might introduce to a project could eventually spin out of control. The first post I saw advocating for npm scripts as the entry point for a build process was by James Halliday. His post perfectly sums up the ignored power of npm scripts (emphasis mine):
There are some fancy tools for doing build automation on JavaScript projects that I’ve never felt the appeal of because the lesser-known
npm runcommand has been perfectly adequate for everything I’ve needed to do while maintaining a very tiny configuration footprint.
Did you catch that last bit at the end? The primary appeal of npm scripts is that they have a “very tiny configuration footprint.” This is one of the main reasons why npm scripts have started to catch on (almost four years later, sadly). With Grunt, Gulp and even Webpack, one eventually begins to drown in plugins that wrap binaries and double the number of dependencies in a project.
Keith Cirkel has the go-to tutorial on using npm to replace Grunt or Gulp. He provides the blueprint for how to fully leverage the power of npm scripts, and he’s introduced an essential plugin, Parallel Shell (and a host of others just like it).
In our section about Grunt, we took the popular module Grunticon and created SVG icons (with PNG fallbacks) in a Grunt task. This used to be the one pain point with npm scripts for me. For a while, I would keep Grunt installed for projects just to use Grunticon. I would literally “shell out” to Grunt in my npm task to achieve task-runner inception (or, as we started calling it at work, a build-tool turducken). Thankfully, The Filament Group, the fantastic group behind Grunticon, released a standalone (i.e. Grunt-free) version of their tool, Grunticon-Lib. So, let’s use it to create some icons with npm scripts!
This example is a little more advanced than a typical npm script task. A typical npm script task is a call to a command-line tool, with the appropriate flags or config file. Here’s a more typical task that compiles our Sass to CSS:
"sass": "node-sass src/scss/ -o dist/css",See how it’s just one line with various options? No task file needed,
no build tool to spin up — just npm run sass from the
command line, and you’re Sass is now CSS. One really nice feature of npm
scripts is how you can chain script tasks together. For instance, say we
want to run some task before our Sass task runs. We would create a new
script entry like this:
"presass": "echo 'before sass',That’s right: npm understands the pre- prefix. It also
understands the post- prefix. Any script entry with the
same name as another script entry with a pre- or
post- prefix will run before or after that entry.
Converting our icons will require an actual Node.js file. It’s not
too serious, though. Just create a tasks directory, and
create a new file named grunticon.js or
icons.js or whatever makes sense to those working on the
project. Once the file is created, we can write some JavaScript to fire
off our Grunticon process.
Note: All of these examples use ES6, so we’re going to use babel-node to run our task. You can easily use ES5 and Node.js, if that’s more comfortable.
import icons from "grunticon-lib";
import globby from "globby";

let files = globby.sync('src/icons/*');
let options = {
  colors: {
    "blue": "blue"
  }
};

let icon = new icons(files, 'dist/icons', options);

icon.process();
Let’s get into the code and figure out what’s going on.
import (i.e. require) two libraries,
grunticon-lib and globby. Globby is one of my
favorite tools, and it makes working with files and globs so easy.
Globby enhances Node.js
Glob (select all JavaScript files via ./*.js) with
Promise support. In this case, we’re using it to get all files in the
src/icons directory.options
object and then call Grunticon-Lib with three arguments:
"icons": "babel-node tasks/icons.js".npm run icons, and our icons will get
created every time.npm scripts offer a similar level of power and flexibility as other task runners, without the plugin debt.
| Tool | Pros | Cons |
|---|---|---|
| Grunt | No real programming knowledge needed | The most verbose of the task runners covered here |
| Gulp | Configure tasks with actual JavaScript and streams | Requires knowledge of JavaScript |
| Adds code to a project (potentially more bugs) | ||
| Webpack | Best in class at module-bundling | More difficult for more generic tasks (for example, Sass to CSS) |
| npm scripts | Direct interaction with command-line tools. | Some tasks aren’t possible without a task runner. |
All of these examples and task runners might seem overwhelming, so let’s break it down. First, I hope you don’t take away from this article that whatever task runner or build system you are currently using needs to be instantly replaced with one mentioned here. Replacing important systems like this shouldn’t be done without much consideration. Here’s my advice for upgrading an existing system: Do it incrementally.
One incremental approach is to look at writing a few “wrapper” npm scripts around your existing task runners to provide a common vocabulary for build steps that is outside of the actual task runner used. A wrapper script could be as simple as this:
{
  "scripts": {
    "start": "gulp"
  }
}
Many projects utilize the start and test
npm script blocks to help new developers get acclimatized quickly. A
wrapper script does introduce another layer of abstraction to your task
runner build chain, yet I think it’s worth being able to standardize
around the npm primitives (e.g. test). The npm commands
have better longevitiy than an individual tool.
If you or your team are feeling the pain of maintaining a brittle “bundle order” for your JavaScript, or you’re looking to upgrade to ES6, consider this an opportunity to introduce Webpack to your existing task-running system. Webpack is great in that you can use as much or as little of it as you want and yet still derive value from it. Start just by having it bundle your application code, and then add babel-loader to the mix. Webpack has such a depth of features that it’ll be able to accommodate just about any additions or new features for quite some time.
PostCSS is a great collection of plugins that transform and enhance CSS once it’s written and preprocessed. In other words, it’s a post-processor. It’s easy enough to leverage PostCSS using npm scripts. Say we have a Sass script like in our previous example:
"sass": "node-sass src/scss/ -o dist/css",We can use npm script’s lifecycle keywords to add a
script to run automatically after the Sass task:
"postsass": "postcss --use autoprefixer -c postcss.config.json dist/css/*.css -d dist/css",This script will run every time the Sass script is run. The postcss-cli package is great, because you can specify configuration in a separate file. Notice that in this example, we add another script entry to accomplish a new task; this is a common pattern when using npm scripts. You can create a workflow that accomplishes all of the various tasks your app needs.
Task runners can solve real problems. I’ve used task runners to compile different builds of a JavaScript application, depending on whether the target was production or local development. I’ve also used task runners to compile Handlebars templates, to deploy a website to production and to automatically add vendor prefixes that are missed in my Sass. These are not trivial tasks, but once they are wrapped up in a task runner, they became effortless.
Task runners are constantly evolving and changing. I’ve tried to cover the most used ones in the current zeitgeist. However, there are others that I haven’t even mentioned, such as Broccoli, Brunch and Harp. Remember that these are just tools: Use them only if they solve a particular problem, not because everyone else is using them. Happy task running!